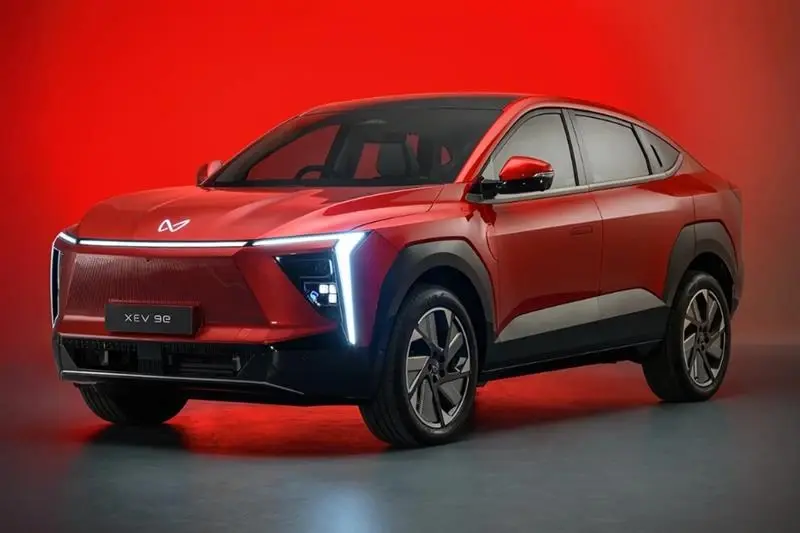
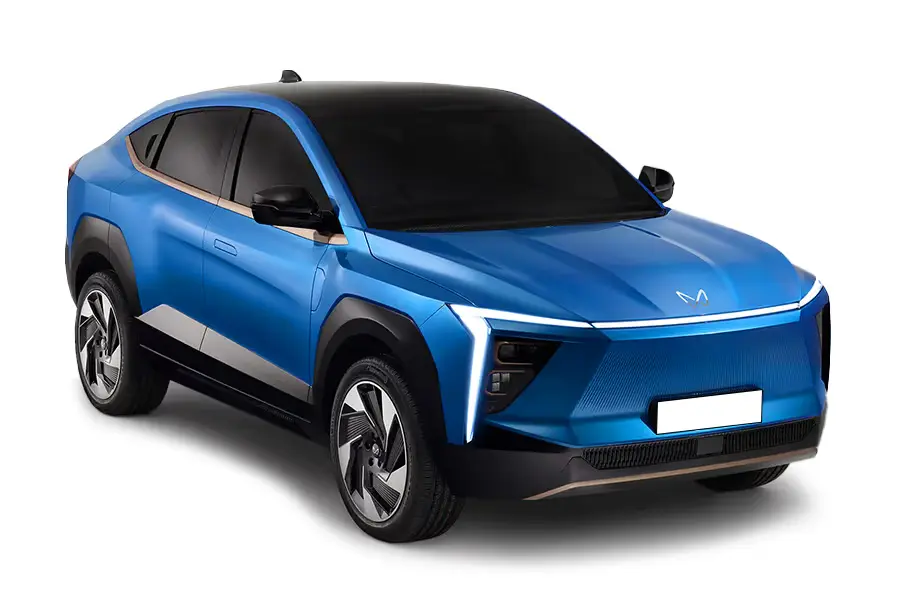
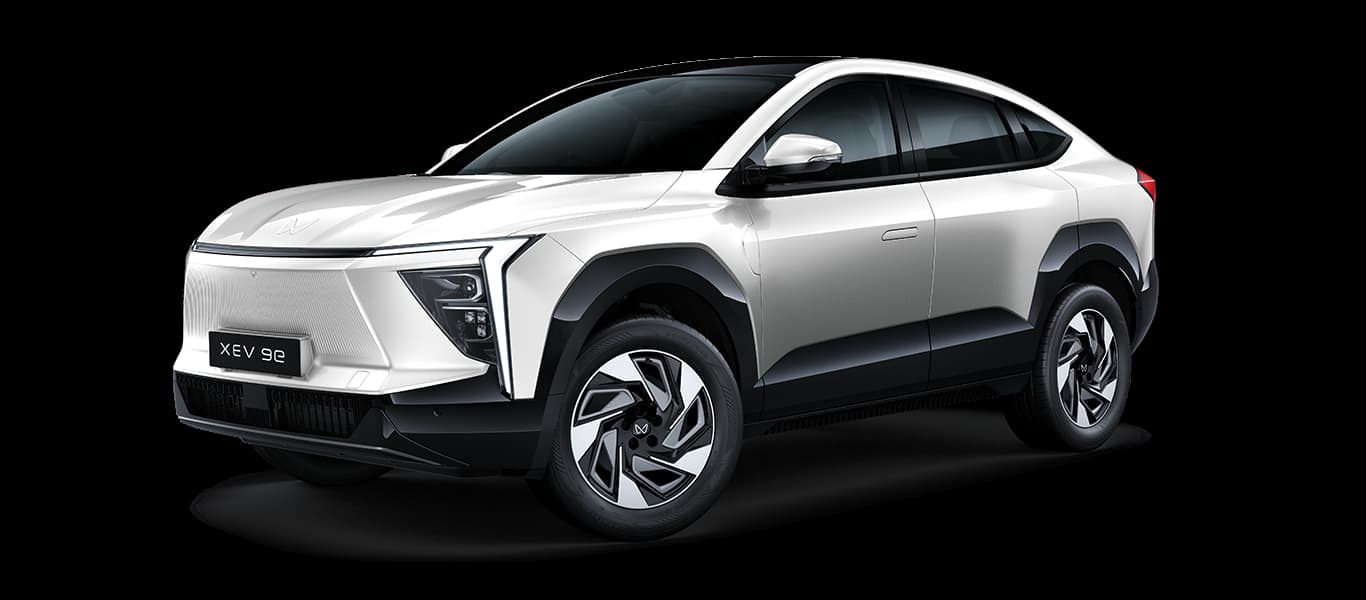
Overview of Variants
Mahindra XEV 9e Variants: Mahindra XEV 9e comes in four core trims — Pack One, Pack Two, Pack Three Select, and Pack Three — with two battery choices (59 kWh / 79 kWh) and three onboard-charger options (No Charger, 7.2 kW, 11.2 kW). The 59 kWh claims 542 km (ARAI) and the 79 kWh 656 km (ARAI). Across trims, you get a triple-screen dash, AR HUD, Auto-Park Assistant, Level-2 ADAS (top trim), RWD, and multiple regen levels, including single-pedal drive.
| Name of Variant | Short description (in points) | Key features |
|---|---|---|
| Pack One | – Entry-level – 59 kWh only – 3 charger choices (NCH / 7.2 kW / 11.2 kW) – Passive suspension | • 59 kWh (ARAI 542 km) • Triple-screen dashboard + 16-speaker setup • 6 airbags, reverse parking camera, EPB, TPMS • 19-inch stylised wheels • Rear-wheel drive, multi-level regen |
| Pack Two | – Mid-level, best value recommendation – Available with 59 kWh & 79 kWh – 3 charger choices | • All Pack One safety features • Adds Head-Up Display (HUD) • 19-inch alloy wheels • Choice of 59 kWh (542 km) or 79 kWh (656 km) • Passive suspension (upgraded interior vs Pack One) |
| Pack Three Select | – Premium mid/top step – 59 kWh only – 3 charger choices – Intelligent adaptive suspension | • All Pack Two features • Blind-spot monitoring • Intelligent adaptive suspension (MTV-CL tech) • Upgraded interior over Pack Two |
| Pack Three | – Top-spec flagship – 79 kWh only (max range) – 3 charger choices | • All Pack Three Select features • Level-2 ADAS (Auto Lane Change, Lane Keep Assist etc.) • 360° surround-view camera, Auto-Park Assist • AR-based HUD, premium interior finishes • Intelligent adaptive suspension, 19-inch alloy wheels |
 |  |  |  |  |  |  |  |  |  |  |  | | |  | |
| Name | Mahindra XEV 9e | Mahindra XEV 9e | Mahindra XEV 9e | Mahindra XEV 9e | Mahindra XEV 9e | Mahindra XEV 9e | Mahindra XEV 9e | Mahindra XEV 9e | Mahindra XEV 9e | Mahindra XEV 9e | Mahindra XEV 9e | Mahindra XEV 9e | Mahindra XEV 9e | Mahindra XEV 9e | Mahindra XEV 9e |
| Model | PACK THREE 79KWH | PACK TWO 59KWH | PACK TWO 11.2kW charger 59KWH | PACK TWO 7.2kW charger 59KWH | PACK THREE 11.2kW Charger 79KWH | PACK THREE 7.2kW Charger 79KWH | PACK ONE 59 kWh | PACK ONE 11.2kW Charger 59 kWh | PACK ONE 7.2kW Charger 59 kWh | PACK TWO 79 kWh | PACK TWO 11.2kW Charger 79 kWh | PACK TWO 7.2kW Charger 79 kWh | PACK THREE SELECT 59KWH | PACK THREE SELECT 11.2kW Charger 59KWH | PACK THREE SELECT 7.2kW Charger 59KWH |
| Year | 2024 | 2024 | 2024 | 2024 | 2024 | 2024 | 2024 | 2024 | 2024 | 2025 | 2025 | 2025 | 2024 | 2024 | 2024 |
| Price | ₹30,50,000 | ₹24,90,000 | ₹25,65,000 | ₹25,40,000 | ₹31,25,000 | ₹31,00,000 | ₹21,90,000 | ₹22,65,000 | ₹22,40,000 | ₹26,50,000 | ₹27,25,000 | ₹27,00,000 | ₹27,90,000 | ₹28,65,000 | ₹28,40,000 |
Charging Info ⯆ | |||||||||||||||
| AC charging time (0-100% SoC) | 8 / 11.7 h (11.2 kW / 7.2 kW Charger) | 8 / 11.7 h (11.2 kW / 7.2 kW Charger) | 8 / 11.7 h (11.2 kW / 7.2 kW Charger) | 8 / 11.7 h (11.2 kW / 7.2 kW Charger) | 8 / 11.7 h (11.2 kW / 7.2 kW Charger) | 8 / 11.7 h (11.2 kW / 7.2 kW Charger) | 6 / 8.7 h (11.2 kW / 7.2 kW charger) | 6 / 8.7 h (11.2 kW / 7.2 kW charger) | 6 / 8.7 h (11.2 kW / 7.2 kW charger) | 6 / 8.7 h (11.2 kW / 7.2 kW charger) | 6 / 8.7 h (11.2 kW / 7.2 kW charger) | 6 / 8.7 h (11.2 kW / 7.2 kW charger) | 8 / 11.7 h (11.2 kW / 7.2 kW Charger) | 6 / 8.7 h (11.2 kW / 7.2 kW Charger) | 6 / 8.7 h (11.2 kW / 7.2 kW Charger) |
| DC charging time (0-100% SoC) | |||||||||||||||
| Charging Port | CCS-II | CCS-II | CCS-II | CCS-II | CCS-II | CCS-II | CCS-II | CCS-II | CCS-II | CCS-II | CCS-II | CCS-II | CCS-II | CCS-II | CCS-II |
| Charging Options | 13A (upto 3.2kW) | 7.2kW | 11.2kW | 180 kW DC | 13A (upto 3.2kW) | 7.2kW | 11.2kW | 180 kW DC | 13A (upto 3.2kW) | 7.2kW | 11.2kW | 180 kW DC | 13A (upto 3.2kW) | 7.2kW | 11.2kW | 180 kW DC | 13A (upto 3.2kW) | 7.2kW | 11.2kW | 180 kW DC | 13A (upto 3.2kW) | 7.2kW | 11.2kW | 180 kW DC | 7.2kW & 11.2kW AC, 140kW DC fast charging (supports up to 175kW) | 7.2kW & 11.2kW AC, 140kW DC fast charging (supports up to 175kW) | 7.2kW & 11.2kW AC, 140kW DC fast charging (supports up to 175kW) | 7.2 & 11.2 kW AC Wall Box, DC Fast charging using a 140 kW DC fast charger | 7.2 & 11.2 kW AC Wall Box, DC Fast charging using a 140 kW DC fast charger | 7.2 & 11.2 kW AC Wall Box, DC Fast charging using a 140 kW DC fast charger | 13A (upto 3.2kW) | 7.2kW | 11.2kW | 180 kW DC | 13A (upto 3.2kW) | 7.2kW | 11.2kW | 180 kW DC | 13A (upto 3.2kW) | 7.2kW | 11.2kW | 180 kW DC |
| Charging Time (15/16 A Plug Point) | 24 Hours approx | 24 Hours approx | 24 Hours approx | 24 Hours approx | 24 Hours approx | 24 Hours approx | 24 Hours approx | 24 Hours approx | 24 Hours approx | ||||||
| Wireless Mobile Charging | Yes, Front & Rear | Yes, Front & Rear | Yes, Front & Rear | Yes, Front & Rear | |||||||||||
| AC Portable Charger | 13A (up to 3.0kW), compatible with household 3-pin 16A socket | 13A (up to 3.0kW), compatible with household 3-pin 16A socket | 13A (up to 3.0kW), compatible with household 3-pin 16A socket | 13A (up to 3.0kW), compatible with household 3-pin 16A socket | 13A (up to 3.0kW), compatible with household 3-pin 16A socket | 13A (up to 3.0kW), compatible with household 3-pin 16A socket | 13A (up to 3.0kW), compatible with household 3-pin 16A socket | 13A (up to 3.0kW), compatible with household 3-pin 16A socket | 13A (up to 3.0kW), compatible with household 3-pin 16A socket | 13A (up to 3.0kW), compatible with household 3-pin 16A socket | 13A (up to 3.0kW), compatible with household 3-pin 16A socket | 13A (up to 3.0kW), compatible with household 3-pin 16A socket | 13A (up to 3.0kW), compatible with household 3-pin 16A socket | 13A (up to 3.0kW), compatible with household 3-pin 16A socket | 13A (up to 3.0kW), compatible with household 3-pin 16A socket |
| Home Charger | AC charging options of 7.2 kW and 11.2 kW | AC charging options of 7.2 kW and 11.2 kW | 11.2kW Charger included | 7.2kW Charger included | 11.2kW Charger included | 7.2kW Charger included | 7.2kW & 11kW options | 11.2kW Charger included | 11.2kW Charger included | 7.2kW & 11kW options | 11.2kW Charger included | 11.2kW Charger included | AC charging options of 7.2 kW and 11.2 kW | 11.2kW Charger included | 7.2kW Charger included |
| Charging Limiter | |||||||||||||||
| Scheduled Charging & Scheduled Cabin Conditioning | |||||||||||||||
| AC charging time (0-80% SoC) | Approx. 6 hr 49 min | Approx. 6 hr 49 min | Approx. 6 hr 49 min | Approx. 6 hr 49 min | Approx. 6 hr 49 min | Approx. 6 hr 49 min | |||||||||
| AC charging time (20-80% SoC) | |||||||||||||||
| DC charging time (20-80% SoC) | 20min (with 140kW 400A charger input) | 20min (with 140kW 400A charger input) | |||||||||||||
| DC charging time (0-80% SoC) | |||||||||||||||
| Charger type / charging standard | CCS2 connectors for DC fast charging and Type 2 connectors for AC charging | CCS2 connectors for DC fast charging and Type 2 connectors for AC charging | CCS2 connectors for DC fast charging and Type 2 connectors for AC charging | CCS2 | CCS2 | CCS2 | CCS2 connectors for DC fast charging and Type 2 connectors for AC charging | CCS2 connectors for DC fast charging and Type 2 connectors for AC charging | CCS2 connectors for DC fast charging and Type 2 connectors for AC charging | ||||||
| DC charging time (10-80% SoC) | |||||||||||||||
Warranty ⯆ | |||||||||||||||
| Battery Warranty | Unlimited km for 15 years ( first Owner ) & 10 years and 2Lac Km for Second owner onwards | Lifetime warranty | Lifetime warranty | Lifetime warranty | Lifetime warranty | Lifetime warranty | Lifetime warranty | Lifetime warranty | Lifetime warranty | Life-time Wrranty | Life-time Wrranty | Life-time Wrranty | Lifetime warranty | Lifetime warranty | Lifetime warranty |
| Motor Warranty | |||||||||||||||
| Vehicle Warranty | |||||||||||||||
| Tyre Warranty | |||||||||||||||
| Home Charger Warranty | |||||||||||||||
| Portable Charger Warranty | |||||||||||||||
Learn More ⯆ | |||||||||||||||
| Read more | |||||||||||||||
| Watch Video | |||||||||||||||
Pricing ⯆ | |||||||||||||||
| Ex Showroom Price | 3050000 | 2490000 | 2565000 | 2540000 | 3125000 | 3100000 | 2190000 | 2265000 | 2240000 | 2650000 | 2725000 | 2700000 | 2790000 | 2865000 | 2840000 |
Comfort & Convenience ⯆ | |||||||||||||||
| Push Start | |||||||||||||||
| Frunk Space (litres) | 150 litres | 150 litres | 150 litres | 150 litres | 150 litres | 150 litres | 150 litres | 150 litres | 150 litres | 150 litres | 150 litres | 150 litres | 150 litres | 150 litres | 150 litres |
| Boot Space (litres) | 663 litres | 663 litres | 663 litres | 663 litres | 663 litres | 663 litres | 663 litres | 663 litres | 663 litres | 663 litres | 663 litres | 663 litres | 663 litres | 663 litres | 663 litres |
| Auto Headlamps | |||||||||||||||
| Rain Sensing Wipers | |||||||||||||||
| 2nd row AC vents | |||||||||||||||
| Seat Belt Adjustment | |||||||||||||||
| Console Storage Cooling | |||||||||||||||
| Seat Recline | 2nd Row 60:40 seat | 2nd Row 60:40 seat | 2nd Row 60:40 seat | 2nd Row 60:40 seat | 2nd Row 60:40 seat | 2nd Row 60:40 seat | 2nd Row 60:40 seat | 2nd Row 60:40 seat | 2nd Row 60:40 seat | ||||||
| Auto AC | Dual zone (DATC) | Dual zone (DATC) | Dual zone (DATC) | Dual zone (DATC) | Dual zone (DATC) | Dual zone (DATC) | Yes, Single zone (FATC) | Yes, Single zone (FATC) | Yes, Single zone (FATC) | Dual zone (DATC) | Dual zone (DATC) | Dual zone (DATC) | Dual zone (DATC) | Dual zone (DATC) | Dual zone (DATC) |
| Door Glass | Acoustic Laminated Door Glass (99.5%* UV ray filtration) | Acoustic Laminated Door Glass (99.5%* UV ray filtration) | Acoustic Laminated Door Glass (99.5%* UV ray filtration) | Acoustic Laminated Door Glass (99.5%* UV ray filtration) | Acoustic Laminated Door Glass (99.5%* UV ray filtration) | Acoustic Laminated Door Glass (99.5%* UV ray filtration) | Acoustic Laminated Door Glass (99.5%* UV ray filtration) | Acoustic Laminated Door Glass (99.5%* UV ray filtration) | Acoustic Laminated Door Glass (99.5%* UV ray filtration) | ||||||
| Power Adjusted Driver Seat | 6 way powered + adj lumbar (manual) | 6 way powered + adj lumbar (manual) | 6 way powered + adj lumbar (manual) | 6 way powered + adj lumbar (manual) | 6 way powered + adj lumbar (manual) | 6 way powered + adj lumbar (manual) | 6 way manual | 6 way manual | 6 way manual | 6 way powered + adj lumbar (manual) | 6 way powered + adj lumbar (manual) | 6 way powered + adj lumbar (manual) | 6 way powered + adj lumbar (manual) | 6 way powered + adj lumbar (manual) | 6 way powered + adj lumbar (manual) |
| Power Adjusted Co-Driver Seat | |||||||||||||||
| Electric adjust ORVM | |||||||||||||||
| Power fold ORVM | |||||||||||||||
| ORVM Auto Dip on Reverse | |||||||||||||||
| Auto Dimming IRVM | |||||||||||||||
| Ventilated Front Seats | |||||||||||||||
| Ventilated Rear Seats | |||||||||||||||
| Door Handles | Front Flush Door handles ( not Electronically deployed ) | Front Flush Door handles ( not Electronically deployed ) | Front Flush Door handles ( not Electronically deployed ) | Front Flush Door handles ( not Electronically deployed ) | Front Flush Door handles ( not Electronically deployed ) | Front Flush Door handles ( not Electronically deployed ) | Front Flush Door handles ( not Electronically deployed ) | Front Flush Door handles ( not Electronically deployed ) | Front Flush Door handles ( not Electronically deployed ) | Front Flush Door handles ( not Electronically deployed ) | Front Flush Door handles ( not Electronically deployed ) | Front Flush Door handles ( not Electronically deployed ) | Front Flush Door handles ( not Electronically deployed ) | Front Flush Door handles ( not Electronically deployed ) | Front Flush Door handles ( not Electronically deployed ) |
| Window Sun Shades | |||||||||||||||
| One Touch Driver Power Window | |||||||||||||||
| Parcel Shelf | |||||||||||||||
| Front Row Arm Rest with Storage | |||||||||||||||
| 2nd Row Arm Rest with Cup Holder | |||||||||||||||
| Magzine Pockets for Rear Passengers | |||||||||||||||
| Bottle Holder | All 4 Doors | All 4 Doors | All 4 Doors | All 4 Doors | All 4 Doors | All 4 Doors | All 4 Doors | All 4 Doors | All 4 Doors | ||||||
| Umbrella Holder | |||||||||||||||
| Heads Up Display (augmented reality HUD) | |||||||||||||||
| 2nd Row Recline | Yes, Multi-step | Yes, Multi-step | Yes, Multi-step | Yes, Multi-step | Yes, Multi-step | Yes, Multi-step | Yes, Multi-step | Yes, Multi-step | Yes, Multi-step | Yes, Multi-step | Yes, Multi-step | Yes, Multi-step | Yes, Multi-step | Yes, Multi-step | Yes, Multi-step |
| Soft Wrapped Dashboard & Door Trims | |||||||||||||||
| Keep, Pet & Camp Modes (climate control) | |||||||||||||||
| Interior Device Charging Port | Front (15W x 1 + 65 W X 1) Rear ( 65W X 2) | Front (15W x 1 + 65 W X 1) Rear ( 65W X 2) | Front (15W x 1 + 65 W X 1) Rear ( 65W X 2) | Front (15W x 1 + 65 W X 1) Rear ( 65W X 2) | Front (15W x 1 + 65 W X 1) Rear ( 65W X 2) | Front (15W x 1 + 65 W X 1) Rear ( 65W X 2) | Front (15W x 1 + 65 W X 1) Rear ( 65W X 2) | Front (15W x 1 + 65 W X 1) Rear ( 65W X 2) | Front (15W x 1 + 65 W X 1) Rear ( 65W X 2) | ||||||
| Power Socket in Boot | 12V conventional power socket in boot | 12V conventional power socket in boot | 12V conventional power socket in boot | 12V conventional power socket in boot | 12V conventional power socket in boot | 12V conventional power socket in boot | Yes, 12 V | Yes, 12 V | Yes, 12 V | Yes, 12V | Yes, 12V | Yes, 12V | 12V conventional power socket in boot | 12V conventional power socket in boot | 12V conventional power socket in boot |
| ISOFIX Rear Seats | |||||||||||||||
| ESP | |||||||||||||||
| Door Open Alert (DOA) | |||||||||||||||
| Autonomous Emergency Steering (AES) | |||||||||||||||
| Evasive Steering Assist (ESA) | |||||||||||||||
| Emergency Lane Keep Assist | |||||||||||||||
| Highway Assist (including driver initiated auto lane change) | |||||||||||||||
| Rear Collision Warning (RCW) | |||||||||||||||
Technology ⯆ | |||||||||||||||
| Screen Size | Coast-to-Coast triple super screens (12.3" x 3) | Coast-to-Coast triple super screens (12.3" x 3) | Coast-to-Coast triple super screens (12.3" x 3) | Coast-to-Coast triple super screens (12.3" x 3) | Coast-to-Coast triple super screens (12.3" x 3) | Coast-to-Coast triple super screens (12.3" x 3) | 12.3 inches | 12.3 inches | 12.3 inches | 12.3-inch touchscreen | 12.3-inch touchscreen | 12.3-inch touchscreen | Coast-to-Coast triple super screens (12.3" x 3) | Coast-to-Coast triple super screens (12.3" x 3) | Coast-to-Coast triple super screens (12.3" x 3) |
| Chipset & Memory | Qualcomm 8295 Snapdragon Chipset with 24 GB RAM & 128 GB Storage | Qualcomm 8295 Snapdragon Chipset with 24 GB RAM & 128 GB Storage | Qualcomm 8295 Snapdragon Chipset with 24 GB RAM & 128 GB Storage | Qualcomm 8295 Snapdragon Chipset with 24 GB RAM & 128 GB StorageQualcomm 8295 Snapdragon Chipset with 24 GB RAM & 128 GB Storage | Qualcomm 8295 Snapdragon Chipset with 24 GB RAM & 128 GB Storage | Qualcomm 8295 Snapdragon Chipset with 24 GB RAM & 128 GB Storage | Qualcomm 8295 Snapdragon Chipset with 24 GB RAM & 128 GB Storage | Qualcomm 8295 Snapdragon Chipset with 24 GB RAM & 128 GB Storage | Qualcomm 8295 Snapdragon Chipset with 24 GB RAM & 128 GB Storage | Qualcomm 8295 Snapdragon Chipset with 24 GB RAM & 128 GB Storage | Qualcomm 8295 Snapdragon Chipset with 24 GB RAM & 128 GB Storage | Qualcomm 8295 Snapdragon Chipset with 24 GB RAM & 128 GB Storage | Qualcomm 8295 Snapdragon Chipset with 24 GB RAM & 128 GB Storage | Qualcomm 8295 Snapdragon Chipset with 24 GB RAM & 128 GB Storage | Qualcomm 8295 Snapdragon Chipset with 24 GB RAM & 128 GB Storage |
| Wireless Technology | Built in Amazon Alexa & Chat GPT | Built in Amazon Alexa & Chat GPT | Built in Amazon Alexa & Chat GPT | Built in Amazon Alexa & Chat GPT | Built in Amazon Alexa & Chat GPT | Built in Amazon Alexa & Chat GPT | Android Auto & CarPlay | Android Auto & CarPlay | Android Auto & CarPlay | Built in Amazon Alexa & Chat GPT | Built in Amazon Alexa & Chat GPT | Built in Amazon Alexa & Chat GPT | |||
| Connectivity | Superfast 5G in-vehicle connectivity & Connected car suite (Me4U App) | Superfast 5G in-vehicle connectivity & Connected car suite (Me4U App) | Superfast 5G in-vehicle connectivity & Connected car suite (Me4U App) | Superfast 5G in-vehicle connectivity & Connected car suite (Me4U App) | Superfast 5G in-vehicle connectivity & Connected car suite (Me4U App) | Superfast 5G in-vehicle connectivity & Connected car suite (Me4U App) | Superfast 5G in-vehicle connectivity & Connected car suite (Me4U App) | Superfast 5G in-vehicle connectivity & Connected car suite (Me4U App) | Superfast 5G in-vehicle connectivity & Connected car suite (Me4U App) | Superfast 5G in-vehicle connectivity & Connected car suite (Me4U App) | Wireless Android Auto & CarPlay | Superfast 5G in-vehicle connectivity & Connected car suite (Me4U App) | Superfast 5G in-vehicle connectivity & Connected car suite (Me4U App) | Superfast 5G in-vehicle connectivity & Connected car suite (Me4U App) | Superfast 5G in-vehicle connectivity & Connected car suite (Me4U App) |
| Apps | Pre-installed OTT, Social Media, News, Shopping Apps | Pre-installed OTT, Social Media, News, Shopping Apps | Pre-installed OTT, Social Media, News, Shopping Apps | Pre-installed OTT, Social Media, News, Shopping Apps | Pre-installed OTT, Social Media, News, Shopping Apps | Pre-installed OTT, Social Media, News, Shopping Apps | Pre-installed OTT, Social Media, News, Shopping Apps | Pre-installed OTT, Social Media, News, Shopping Apps | Pre-installed OTT, Social Media, News, Shopping Apps | Pre-installed OTT, Social Media, News, Shopping Apps | Pre-installed OTT, Social Media, News, Shopping Apps | Pre-installed OTT, Social Media, News, Shopping Apps | Pre-installed OTT, Social Media, News, Shopping Apps | Pre-installed OTT, Social Media, News, Shopping Apps | Pre-installed OTT, Social Media, News, Shopping Apps |
| BYOD ( Bring your own Device) | |||||||||||||||
| Connected Features | Wireless Android Auto & CarPlay | Wireless Android Auto & CarPlay | Wireless Android Auto & CarPlay | Wireless Android Auto & CarPlay | Wireless Android Auto & CarPlay | Wireless Android Auto & CarPlay | Wireless Android Auto & CarPlay | Wireless Android Auto & CarPlay | Wireless Android Auto & CarPlay | Wireless Android Auto & CarPlay | Wireless Android Auto & CarPlay | Wireless Android Auto & CarPlay | Wireless Android Auto & CarPlay | Wireless Android Auto & CarPlay | Wireless Android Auto & CarPlay |
| Speakers | Harman Kardon 16 speaker immersive audio | Harman Kardon 16 speaker immersive audio | Harman Kardon 16 speaker immersive audio | Harman Kardon 16 speaker immersive audio | Harman Kardon 16 speaker immersive audio | Harman Kardon 16 speaker immersive audio | 6 speakers | 6 speakers | 6 speakers | Harman Kardon 16 speaker immersive audio | Harman Kardon 16 speaker immersive audio | Harman Kardon 16 speaker immersive audio | Harman Kardon 16 speaker immersive audio | Harman Kardon 16 speaker immersive audio | Harman Kardon 16 speaker immersive audio |
| Dolby Atmos | Harman Kardon sound system with Dolby Atmos | Harman Kardon sound system with Dolby Atmos | Harman Kardon sound system with Dolby Atmos | Harman Kardon sound system with Dolby Atmos | Harman Kardon sound system with Dolby Atmos | Harman Kardon sound system with Dolby Atmos | Harman Kardon sound system with Dolby Atmos | Harman Kardon sound system with Dolby Atmos | Harman Kardon sound system with Dolby Atmos | Harman Kardon sound system with Dolby Atmos | Harman Kardon sound system with Dolby Atmos | Harman Kardon sound system with Dolby Atmos | |||
| Voice Commands | |||||||||||||||
| NFC Key | |||||||||||||||
| Passive Keyless Entry (PKE) | |||||||||||||||
| Auto Park | |||||||||||||||
| Video calling with in-car camera | |||||||||||||||
| AIR Purifier | |||||||||||||||
| Internet Connectivity | 5G | 5G | 5G | 5G | 5G | 5G | 5G | 5G | 5G | 5G | 5G | 5G | 5G | 5G | 5G |
| Power Tailgate with Gesture Control | |||||||||||||||
| Tailgate Ajar Warning | |||||||||||||||
| Vechicle to Vehicle Charging | |||||||||||||||
| Vehicle to Load Charging | |||||||||||||||
| Heater | |||||||||||||||
| Follow Me Home Headlamps | |||||||||||||||
| Memory Function Seats | Driver seat | Driver seat | Driver seat | ||||||||||||
| LightMeUp (ambient lights) | Yes, 16 million hues ambient lighting system | Yes, 16 million hues ambient lighting system | Yes, 16 million hues ambient lighting system | ||||||||||||
| OTA Updates (infotainment & maps) | |||||||||||||||
| OTA Updates (vehicle features) | |||||||||||||||
| OTA Updates (ePowertrain) | |||||||||||||||
| Ecosense & Driving Analytics | |||||||||||||||
| App Store | |||||||||||||||
| Music & Calling Connectivity | |||||||||||||||
Safety ⯆ | |||||||||||||||
| Airbags | 7 airbags (front, side, curtain & driver knee) | 7 airbags (front, side, curtain & driver knee) | 7 airbags (front, side, curtain & driver knee) | 7 airbags (front, side, curtain & driver knee) | 7 airbags (front, side, curtain & driver knee) | 7 airbags (front, side, curtain & driver knee) | 6 | 6 | 6 | 6 | 6 | 6 | 7 airbags (front, side, curtain & driver knee) | 7 airbags (front, side, curtain & driver knee) | 7 airbags (front, side, curtain & driver knee) |
| Body Shell | High Stiffness Bodyshell | High Stiffness Bodyshell | High Stiffness Bodyshell | High Stiffness Bodyshell | High Stiffness Bodyshell | High Stiffness Bodyshell | High Stiffness Bodyshell | High Stiffness Bodyshell | High Stiffness Bodyshell | High Stiffness Bodyshell | High Stiffness Bodyshell | High Stiffness Bodyshell | High Stiffness Bodyshell | High Stiffness Bodyshell | High Stiffness Bodyshell |
| Front Brake Type | Disc | Disc | Disc | Disc | Disc | Disc | Disc | Disc | Disc | Disc | Disc | Disc | Disc | Disc | Disc |
| Rear Brake Type | Disc | Disc | Disc | Disc | Disc | Disc | Disc | Disc | Disc | Disc | Disc | Disc | Disc | Disc | Disc |
| Brake Technology | Brake-by-wire with IEB | Brake-by-wire with IEB | Brake-by-wire with IEB | Brake-by-wire with IEB | Brake-by-wire with IEB | Brake-by-wire with IEB | Brake-by-wire with IEB | Brake-by-wire with IEB | Brake-by-wire with IEB | Brake-by-wire with IEB | Brake-by-wire with IEB | Brake-by-wire with IEB | Brake-by-wire with IEB | Brake-by-wire with IEB | Brake-by-wire with IEB |
| EyeDentity (driver & occupant Monitoring) | |||||||||||||||
| EPB (electric park brake) | |||||||||||||||
| Rear Parking Sensor | |||||||||||||||
| Front Parking Sensor | |||||||||||||||
| Radar | 5 Radars & 12 Sensors | 1 Radar + 1 Vision Camera | 1 Radar + 1 Vision Camera | 1 Radar + 1 Vision Camera | 5 Radars & 12 Sensors | 5 Radars & 12 Sensors | 1 Radar + 1 Vision Camera | 1 Radar + 1 Vision Camera | 1 Radar + 1 Vision Camera | 1 Radar + 1 Vision Camera | 1 Radar + 1 Vision Camera | 1 Radar + 1 Vision Camera | |||
| Reverse Camera | |||||||||||||||
| Tyre Pressure Monitoring | With individual tyre pressure monitoring | With individual tyre pressure monitoring | With individual tyre pressure monitoring | With individual tyre pressure monitoring | With individual tyre pressure monitoring | With individual tyre pressure monitoring | Yes, Alert | Yes, Alert | Yes, Alert | With individual tyre pressure monitoring | With individual tyre pressure monitoring | With individual tyre pressure monitoring | With individual tyre pressure monitoring | With individual tyre pressure monitoring | With individual tyre pressure monitoring |
| Fog Lamps | Yes, Front only | Yes, Front only | Yes, Front only | Yes, Front only | Yes, Front only | Yes, Front only | Front & Rear | Front & Rear | Front & Rear | Yes, Front | |||||
| Cornering Lamps | |||||||||||||||
| Auto Headlamps | |||||||||||||||
| Auto Booster Lamps | |||||||||||||||
| 360 Degree Camera | |||||||||||||||
| Blind Spot Monitor | |||||||||||||||
| Secure 360 - Live View & Recording | |||||||||||||||
| Rear Defogger | |||||||||||||||
| Windshield Auto Defogging | |||||||||||||||
| Central Locking | Keyless | Keyless | Keyless | Keyless | Keyless | Keyless | |||||||||
| Child Safety Locks | |||||||||||||||
| Anti-lock Braking System (ABS) | |||||||||||||||
| Brake Assist | |||||||||||||||
| ADAS | Level 2+ ADAS: 5 radars + 1 vision camera | 1 radar + 1 vision camera | 1 radar + 1 vision camera | 1 radar + 1 vision camera | Level 2+ ADAS: 5 radars + 1 vision camera | Level 2+ ADAS: 5 radars + 1 vision camera | Yes, Level 2, 1 Radar + 1 Vision Camera | Yes, Level 2, 1 Radar + 1 Vision Camera | Yes, Level 2, 1 Radar + 1 Vision Camera | 1 radar + 1 vision camera | 1 radar + 1 vision camera | 1 radar + 1 vision camera | |||
| Forward Collision Warning System (FCW) | Standard | Standard | Standard | Standard | Standard | Standard | Standard | Standard | Standard | ||||||
| Automatic Emergency Braking System (AEB) | Standard | Standard | Standard | Standard | Standard | Standard | Standard | Standard | Standard | ||||||
| Lane Departure Warning System (LDW) | Standard | Standard | Standard | Standard | Standard | Standard | Standard | Standard | Standard | ||||||
| Lane Keep Assist System (LKA) | Standard | Standard | Standard | Standard | Standard | Standard | Standard | Standard | Standard | ||||||
| Lane Sway Alert (LSA) | Standard | Standard | Standard | Standard | Standard | Standard | Standard | Standard | Standard | ||||||
| Lane Centering Function (LCF) | Standard | Standard | Standard | Standard | Standard | Standard | Standard | Standard | Standard | ||||||
| Traffic Sign Recognition (TSR) | Standard | Standard | Standard | Standard | Standard | Standard | Standard | Standard | Standard | ||||||
| Front Vehicle Start Alert (FVSA) | Standard | Standard | Standard | Standard | Standard | Standard | Standard | Standard | Standard | ||||||
| Adaptive Cruise Control (ACC) | |||||||||||||||
| Intelligent Adaptive Cruise Control (iACC) | Standard | Standard | Standard | Standard | Standard | Standard | Standard | Standard | Standard | ||||||
| Smart Pilot Assist (SPA) | Standard | Standard | Standard | Standard | Standard | Standard | Standard | Standard | Standard | ||||||
| Risk Mitigation Support | |||||||||||||||
| High Beam Assist (HBA) | Standard | Standard | Standard | Standard | Standard | Standard | Standard | Standard | Standard | ||||||
| Forward Cross Traffic Alert (FCTA) | Standard | Standard | Standard | Standard | Standard | Standard | Standard | Standard | Standard | Standard | Standard | Standard | |||
| Rear Cross Traffic Alert (RCTA) | Standard | Standard | Standard | ||||||||||||
| Find My Car | |||||||||||||||
| Geo-Fencing | |||||||||||||||
| Live Location Sharing & Tracking | |||||||||||||||
Design ⯆ | |||||||||||||||
| Driving Space | Race-ready Digital Cockpit | Race-ready Digital Cockpit | Race-ready Digital Cockpit | Race-ready Digital Cockpit | Race-ready Digital Cockpit | Race-ready Digital Cockpit | Race-ready Digital Cockpit | Race-ready Digital Cockpit | Race-ready Digital Cockpit | ||||||
| Illuminated Logo | |||||||||||||||
| Headlamps & DRL | Bi LED Projector Headlamps with DRLs | Bi LED Projector Headlamps with DRLs | Bi LED Projector Headlamps with DRLs | Bi LED Projector Headlamps with DRLs | Bi LED Projector Headlamps with DRLs | Bi LED Projector Headlamps with DRLs | Bi LED projector headlamps & LED DRLs - Lit as position lamp | Bi LED projector headlamps & LED DRLs - Lit as position lamp | Bi LED projector headlamps & LED DRLs - Lit as position lamp | Bi LED projector headlamps & LED DRLs | Bi LED projector headlamps & LED DRLs | Bi LED projector headlamps & LED DRLs | Bi LED Projector Headlamps with DRLs | Bi LED Projector Headlamps with DRLs | Bi LED Projector Headlamps with DRLs |
| Tail Lamps | LED Tail lamps | LED Tail lamps | LED Tail lamps | LED Tail lamps | LED Tail lamps | LED Tail lamps | LED | LED | LED | LED | LED | LED | LED Tail lamps | LED Tail lamps | LED Tail lamps |
| Upholstery | Leatherette | Leatherette | Leatherette | Leatherette | Leatherette | Leatherette | Premium fabric | Premium fabric | Premium fabric | Leatherette | Leatherette | Leatherette | Leatherette | Leatherette | Leatherette |
| Wheels | 245/55 R19 Alloy | 245/55 R19 Alloy | 245/55 R19 Alloy | 245/55 R19 Alloy | 245/55 R19 Alloy | 245/55 R19 Alloy | 19 inches (Stylised wheel) | 19 inches (Stylised wheel) | 19 inches (Stylised wheel) | Alloy, 19 inches | Alloy, 19 inches | Alloy, 19 inches | 245/55 R19 Alloy | 245/55 R19 Alloy | 245/55 R19 Alloy |
| Spare Wheel | T 135/80 R18 | T 135/80 R18 | T 135/80 R18 | T 135/80 R18 | T 135/80 R18 | T 135/80 R18 | T 135/80 R18 | T 135/80 R18 | T 135/80 R18 | T 135/80 R18 | T 135/80 R18 | T 135/80 R18 | T 135/80 R18 | T 135/80 R18 | T 135/80 R18 |
| Cladding | Premium Finish Exterior Cladding | Premium Finish Exterior Cladding | Premium Finish Exterior Cladding | Premium Finish Exterior Cladding | Premium Finish Exterior Cladding | Premium Finish Exterior Cladding | Premium Finish Exterior Cladding | Premium Finish Exterior Cladding | Premium Finish Exterior Cladding | ||||||
| Sunroof | Infinity roof with 16 million hues | Fixed Infinity Glass Roof | Fixed Infinity Glass Roof | Fixed Infinity Glass Roof | Infinity roof with 16 million hues | Infinity roof with 16 million hues | Fixed Infinity Glass Roof | Fixed Infinity Glass Roof | Fixed Infinity Glass Roof | Fixed Infinity Glass Roof | Fixed Infinity Glass Roof | Fixed Infinity Glass Roof | |||
| Stearing Wheel | Electric Power Steering with variable gear ratio | Electric Power Steering with variable gear ratio | Electric Power Steering with variable gear ratio | Electric Power Steering with variable gear ratio | Electric Power Steering with variable gear ratio | Electric Power Steering with variable gear ratio | Electric Power Steering with variable gear ratio | Electric Power Steering with variable gear ratio | Electric Power Steering with variable gear ratio | Electric Power Steering with variable gear ratio | Electric Power Steering with variable gear ratio | Electric Power Steering with variable gear ratio | Electric Power Steering with variable gear ratio | Electric Power Steering with variable gear ratio | Electric Power Steering with variable gear ratio |
| Cap Touch Switches | Yes, Steering wheel & switch bank on dashboard | Yes, Steering wheel & switch bank on dashboard | Yes, Steering wheel & switch bank on dashboard | Yes, Steering wheel & switch bank on dashboard | Yes, Steering wheel & switch bank on dashboard | Yes, Steering wheel & switch bank on dashboard | Switch bank on dashboard | Switch bank on dashboard | Switch bank on dashboard | Switch bank on dashboard | Switch bank on dashboard | Switch bank on dashboard | Steering wheel & switch bank on dashboard | Yes, Steering wheel & switch bank on dashboard | Yes, Steering wheel & switch bank on dashboard |
| Steering Wheel & E-shifter | Yes, Leatherette | Yes, Leatherette | Yes, Leatherette | Leatherette (e-Shifter) | Leatherette (e-Shifter) | Leatherette (e-Shifter) | Yes, Leatherette | Yes, Leatherette | Yes, Leatherette | Yes, Leatherette | Yes, Leatherette | Yes, Leatherette | |||
| Mood Lighting | Ambient light | Ambient light | Ambient light | ||||||||||||
| Night Trail - Carpet Lamps | |||||||||||||||
| Sequential Turn Indicators | |||||||||||||||
| Start Up / Good bye Animations | |||||||||||||||
| Center Tail Lamp with Animations | |||||||||||||||
| Integrated Antenna | |||||||||||||||
| Length (mm) | 4789 mm | 4789 mm | 4789 mm | 4789 mm | 4789 mm | 4789 mm | 4,789 mm | 4,789 mm | 4,789 mm | 4,789 | 4,789 | 4,789 | 4789 mm | 4789 mm | 4789 mm |
| Width (mm) | 1907 mm | 1907 mm | 1907 mm | 1907 mm | 1907 mm | 1907 mm | 1,907 mm | 1,907 mm | 1,907 mm | 1,907 | 1,907 | 1,907 | 1907 mm | 1907 mm | 1907 mm |
| Height (mm) | 1694 mm | 1694 mm | 1694 mm | 1694 mm | 1694 mm | 1694 mm | 1,694 mm | 1,694 mm | 1,694 mm | 1,694 | 1,694 | 1,694 | 1694 mm | 1694 mm | 1694 mm |
| Wheelbase (mm) | 2775 mm | 2775 mm | 2775 mm | 2775 mm | 2775 mm | 2775 mm | 2,775 mm | 2,775 mm | 2,775 mm | 2,775 | 2,775 | 2,775 | 2775 mm | 2775 mm | 2775 mm |
| Ground Clearance (mm) | 207 | 207 | 207 | 207 | 207 | 207 | 207 mm (218 at battery) | 207 mm (218 at battery) | 207 mm (218 at battery) | 207 (218 at battery) | 207 (218 at battery) | 207 (218 at battery) | 207 | 207 | 207 |
| Vanity Mirror | |||||||||||||||
| Rear Reading Lamp | |||||||||||||||
| Rear Seat Headrest | 3 | 3 | 3 | 3 | 3 | 3 | 3 | 3 | 3 | ||||||
| Cup Holders | 2nd row arm rest with cup holder | 2nd row arm rest with cup holder | 2nd row arm rest with cup holder | ||||||||||||
| Digital Cluster | |||||||||||||||
| Body Type | Coupe SUV | Coupe SUV | Coupe SUV | Coupe SUV | Coupe SUV | Coupe SUV | Coupe SUV | Coupe SUV | Coupe SUV | Coupe SUV | Coupe SUV | Coupe SUV | Coupe SUV | Coupe SUV | Coupe SUV |
| Seating Capacity | 5 | 5 | 5 | 5 | 5 | 5 | 5 | 5 | 5 | 5 | 5 | 5 | 5 | 5 | 5 |
| No. of Doors | 5 | 5 | 5 | 5 | 5 | 5 | 5 | 5 | 5 | 5 | 5 | 5 | 5 | 5 | 5 |
| Rear Spoiler | |||||||||||||||
| Electrically Deployed Front Door Handles | |||||||||||||||
| Premium Finish Exterior Cladding | |||||||||||||||
| Rear Seating Dimensions L× W (inch.) | |||||||||||||||
| Front Seating Dimensions L× W (inch.) | |||||||||||||||
Performance ⯆ | |||||||||||||||
| Battery Type | LFP (Lithium Iron Phosphate) | LFP (Lithium Iron Phosphate) | LFP (Lithium Iron Phosphate) | LFP (Lithium Iron Phosphate) | LFP (Lithium Iron Phosphate) | LFP (Lithium Iron Phosphate) | LFP (Lithium Iron Phosphate) | LFP (Lithium Iron Phosphate) | LFP (Lithium Iron Phosphate) | Lithium- ion | Lithium- ion | Lithium- ion | LFP (Lithium Iron Phosphate) | LFP (Lithium Iron Phosphate) | LFP (Lithium Iron Phosphate) |
| Battery Pack | 79 kWh | 59 kWh | 59 kWh | 59 kWh | 79 kWh | 79 kWh | 59 kWh | 59 kWh | 59 kWh | 79 kWh | 79 kWh | 79 kWh | 59 kWh | 59 kWh | 59 kWh |
| Electric Motor Type | Permanent Magnet Synchronous | Permanent Magnet Synchronous | Permanent Magnet Synchronous | Permanent Magnet Synchronous | Permanent Magnet Synchronous | Permanent Magnet Synchronous | Permanent Magnet Synchronous moto | Permanent Magnet Synchronous moto | Permanent Magnet Synchronous moto | Permanent Magnet Synchronous moto | Permanent Magnet Synchronous moto | Permanent Magnet Synchronous moto | Permanent Magnet Synchronous | Permanent Magnet Synchronous | Permanent Magnet Synchronous |
| Electric Motor Max Power (bhp@rpm/KW) | 210 KW | 170 KW | 210 KW | 170 KW | 210 KW | 210 KW | 170 KW | 170 KW | 170 KW | 210 KW | 210 KW | 210 KW | 170 KW | 170 KW | 170 KW |
| Max Torque (nm@rpm) | 380Nm | 380Nm | 380Nm | 380Nm | 380Nm | 380Nm | 380 Nm | 380 Nm | 380 Nm | 380 Nm | 380 Nm | 380 Nm | 380Nm | 380Nm | 380Nm |
| Drive Type | RWD | RWD | RWD | RWD | RWD | RWD | RWD | RWD | RWD | RWD | RWD | RWD | RWD | RWD | RWD |
| Steering Type & Column | Two-spoke design, Electric power steering with VGR | Two-spoke design, Electric power steering with VGR | Two-spoke design, Electric power steering with VGR | Two-spoke design, Electric power steering with VGR | Two-spoke design, Electric power steering with VGR | Two-spoke design, Electric power steering with VGR | Two-spoke design, Electric power steering with VGR | Two-spoke design, Electric power steering with VGR | Two-spoke design, Electric power steering with VGR | Two-spoke design, Electric power steering with VGR | Two-spoke design, Electric power steering with VGR | Two-spoke design, Electric power steering with VGR | Two-spoke design, Electric power steering with VGR | Two-spoke design, Electric power steering with VGR | Two-spoke design, Electric power steering with VGR |
| Steering Adjustment | Tilt & Telescopic Steering | Tilt & Telescopic Steering | Tilt & Telescopic Steering | Tilt & Telescopic Steering | Tilt & Telescopic Steering | Tilt & Telescopic Steering | Tilt & telescopic adjustment | Tilt & telescopic adjustment | Tilt & telescopic adjustment | Tilt & telescopic adjustment | Tilt & telescopic adjustment | Tilt & telescopic adjustment | Tilt & Telescopic Steering | Tilt & Telescopic Steering | Tilt & Telescopic Steering |
| Turning Radius (Metres) | 10m | 10m | 10m | 10m | 10m | 10m | 10 m | 10 m | 10 m | 10 m | 10 m | 10 m | 10m | 10m | 10m |
| Drive Modes | Default, Range, Everyday, Race & Snow Mode | Default, Range, Everyday, Race & Snow Mode | Default, Range, Everyday, Race & Snow Mode | Default, Range, Everyday, Race & Snow Mode | Default, Range, Everyday, Race & Snow Mode | Default, Range, Everyday, Race & Snow Mode | 5 (Default, Range, Everyday, Race & Snow Mode) | 5 (Default, Range, Everyday, Race & Snow Mode) | 5 (Default, Range, Everyday, Race & Snow Mode) | Default, Range, Everyday, Race & Snow Mode | Default, Range, Everyday, Race & Snow Mode | Default, Range, Everyday, Race & Snow Mode | Default, Range, Everyday, Race & Snow Mode | Default, Range, Everyday, Race & Snow Mode | Default, Range, Everyday, Race & Snow Mode |
| Regenerative Braking Levels | L0, L1, L2, L3 (Where L0 is no regeneration and L3 is max regeneration) & auto | L0, L1, L2, L3 (Where L0 is no regeneration and L3 is max regeneration) & auto | L0, L1, L2, L3 (Where L0 is no regeneration and L3 is max regeneration) & auto | L0, L1, L2, L3 (Where L0 is no regeneration and L3 is max regeneration) & auto | L0, L1, L2, L3 (Where L0 is no regeneration and L3 is max regeneration) & auto | L0, L1, L2, L3 (Where L0 is no regeneration and L3 is max regeneration) & auto | L0, L1, L2, L3 (Where L0 is No regeneration and L3 is Max regeneration) & Auto | L0, L1, L2, L3 (Where L0 is No regeneration and L3 is Max regeneration) & Auto | L0, L1, L2, L3 (Where L0 is No regeneration and L3 is Max regeneration) & Auto | L0, L1, L2, L3 (Where L0 is No regeneration and L3 is Max regeneration) & Auto | L0, L1, L2, L3 (Where L0 is No regeneration and L3 is Max regeneration) & Auto | L0, L1, L2, L3 (Where L0 is No regeneration and L3 is Max regeneration) & Auto | L0, L1, L2, L3 (Where L0 is no regeneration and L3 is max regeneration) & auto | L0, L1, L2, L3 (Where L0 is no regeneration and L3 is max regeneration) & auto | L0, L1, L2, L3 (Where L0 is no regeneration and L3 is max regeneration) & auto |
| Single Pedal Drive | |||||||||||||||
| Virtual Engine Sound | SonicSuite with Virtual Engine Sounds | SonicSuite with Virtual Engine Sounds | SonicSuite with Virtual Engine Sounds | SonicSuite with Virtual Engine Sounds | SonicSuite with Virtual Engine Sounds | SonicSuite with Virtual Engine Sounds | SonicSuite with Virtual Engine Sounds | SonicSuite with Virtual Engine Sounds | SonicSuite with Virtual Engine Sounds | ||||||
| Front Suspension | McPherson Strut I-Link independent suspension and stabiliser bar | McPherson Strut I-Link independent suspension and stabiliser bar | McPherson Strut I-Link independent suspension and stabiliser bar | McPherson Strut I-Link independent suspension and stabiliser bar | McPherson Strut I-Link independent suspension and stabiliser bar | McPherson Strut I-Link independent suspension and stabiliser bar | McPherson Strut I-Link independent suspension and stabiliser bar | McPherson Strut I-Link independent suspension and stabiliser bar | McPherson Strut I-Link independent suspension and stabiliser bar | McPherson Strut I-Link independent suspension and stabiliser bar | McPherson Strut I-Link independent suspension and stabiliser bar | McPherson Strut I-Link independent suspension and stabiliser bar | McPherson Strut I-Link independent suspension and stabiliser bar | McPherson Strut I-Link independent suspension and stabiliser bar | McPherson Strut I-Link independent suspension and stabiliser bar |
| Rear Suspension | Multi-Link (5-Link) independent suspension and stabiliser bar | Multi-Link (5-Link) independent suspension and stabiliser bar | Multi-Link (5-Link) independent suspension and stabiliser bar | Multi-Link (5-Link) independent suspension and stabiliser bar | Multi-Link (5-Link) independent suspension and stabiliser bar | Multi-Link (5-Link) independent suspension and stabiliser bar | Multi-Link (5-Link) independent suspension and stabiliser bar | Multi-Link (5-Link) independent suspension and stabiliser bar | Multi-Link (5-Link) independent suspension and stabiliser bar | Multi-Link (5-Link) independent suspension and stabiliser bar | Multi-Link (5-Link) independent suspension and stabiliser bar | Multi-Link (5-Link) independent suspension and stabiliser bar | Multi-Link (5-Link) independent suspension and stabiliser bar | Multi-Link (5-Link) independent suspension and stabiliser bar | Multi-Link (5-Link) independent suspension and stabiliser bar |
| Suspension Damper Type | Intelligent adaptive suspension with MTV-CL tech | Passive suspension with FDD & MTV-CL tech | Passive suspension with FDD & MTV-CL tech | Passive suspension with FDD & MTV-CL tech | Intelligent adaptive suspension with MTV-CL tech | Intelligent adaptive suspension with MTV-CL tech | Passive suspension with FDD & MTV-CL tech | Passive suspension with FDD & MTV-CL tech | Passive suspension with FDD & MTV-CL tech | Passive suspension with FDD & MTV-CL tech | Passive suspension with FDD & MTV-CL tech | Passive suspension with FDD & MTV-CL tech | Intelligent adaptive suspension with MTV-CL tech | Passive suspension with FDD & MTV-CL tech | Passive suspension with FDD & MTV-CL tech |
| Shock Absorbers Type | Intelligent Semi Active | Intelligent Semi Active | Intelligent Semi Active | Intelligent Semi Active | Intelligent Semi Active | Intelligent Semi Active | Intelligent Semi Active | Intelligent Semi Active | Intelligent Semi Active | ||||||
| Technology | MTV-CL technology | MTV-CL technology | MTV-CL technology | MTV-CL technology | MTV-CL technology | MTV-CL technology | MTV-CL technology | MTV-CL technology | MTV-CL technology | ||||||
| Road Vibrations | Frequency Dependent Damping | Frequency Dependent Damping | Frequency Dependent Damping | Frequency Dependent Damping | Frequency Dependent Damping | Frequency Dependent Damping | Frequency Dependent Damping | Frequency Dependent Damping | Frequency Dependent Damping | ||||||
| Tyre Type & Size | Radial Tubeless, 245/55 R19 | Radial Tubeless, 245/55 R19 | Radial Tubeless, 245/55 R19 | Radial Tubeless, 245/55 R19 | Radial Tubeless, 245/55 R19 | Radial Tubeless, 245/55 R19 | Radial tubeless, 245/55 R19 | Radial tubeless, 245/55 R19 | Radial tubeless, 245/55 R19 | Radial Tubeless, 245/55 R19 | Radial Tubeless, 245/55 R19 | Radial Tubeless, 245/55 R19 | Radial Tubeless, 245/55 R19 | Radial Tubeless, 245/55 R19 | Radial Tubeless, 245/55 R19 |
| Cruise Control | Adaptive cruise control | Adaptive cruise control | Adaptive cruise control | Adaptive cruise control | Adaptive cruise control | Adaptive cruise control | |||||||||
| Boost Mode | |||||||||||||||
| Performance Dashboard | |||||||||||||||
| 1-100 Km Acceleration (Sec) | 6.7sec | 6.8 sec | 6.8 sec | 6.8 sec | 6.7sec | 6.7sec | 6.8 s | 6.8 s | 6.8 s | 6.8 sec | 6.8 sec | 6.8 sec | 6.8 sec | 6.8 sec | 6.8 sec |
| Top Speed | 202 kmph | 202 km/hr | 202 km/hr | 202 km/hr | 202 kmph | 202 kmph | 185 km/h | 185 km/h | 185 km/h | 185 km/h | 185 km/h | 185 km/h | 202 km/hr | 202 km/hr | 202 km/hr |
| Real World Range | 400 Km | 400 Km | 400 Km | 400 Km | 400 Km | 400 Km | 400 Km | 400 Km | 400 Km | ||||||
| ARAI Range | 656 km | 542 km | 542 km | 542 km | 656 km | 656 km | 542 km | 542 km | 542 km | 656 km | 656 km | 656 km | 542 km | 542 km | 542 km |
| Number of Electric Motor | 1 | 1 | 1 | 1 | 1 | 1 | 1 | 1 | 1 | 1 | 1 | 1 | 1 | 1 | 1 |
Mahindra XEV 9e variants price list
| Variant Name | Battery & Range | Approx. Price (Ex-Showroom) |
|---|---|---|
| XEV 9e Pack One (Base Model) | 59 kWh • 542 km range | ₹21.90 Lakh |
| XEV 9e Pack One (7.2 kW Charger) | 59 kWh • 542 km range | ₹22.40 Lakh |
| XEV 9e Pack One (11.2 kW Charger) | 59 kWh • 542 km range | ₹22.65 Lakh |
| XEV 9e Pack Two | 59 kWh • 542 km range | ₹24.90 Lakh |
| XEV 9e Pack Two (7.2 kW Charger) | 59 kWh • 542 km range | ₹25.40 Lakh |
| XEV 9e Pack Two (11.2 kW Charger) | 59 kWh • 542 km range | ₹25.65 Lakh |
| XEV 9e Pack Two (79 kWh) | 79 kWh • 656 km range | ₹26.50 Lakh |
| XEV 9e Pack Two (79 kWh, 7.2 kW Charger) | 79 kWh • 656 km range | ₹27.00 Lakh |
| XEV 9e Pack Two (79 kWh, 11.2 kW Charger) | 79 kWh • 656 km range | ₹27.25 Lakh |
| XEV 9e Pack Three Select | 59 kWh • 542 km range | ₹27.90 Lakh |
| XEV 9e Pack Three Select (7.2 kW Charger) | 59 kWh • 542 km range | ₹28.40 Lakh |
| XEV 9e Pack Three Select (11.2 kW Charger) | 59 kWh • 542 km range | ₹28.65 Lakh |
| XEV 9e Pack Three | 79 kWh • 656 km range | ₹30.50 Lakh |
| XEV 9e Pack Three (7.2 kW Charger) | 79 kWh • 656 km range | ₹31.00 Lakh |
| XEV 9e Pack Three (11.2 kW Charger – Top Model) | 79 kWh • 656 km range | ₹31.25 Lakh |
FAQs on Mahindra XEV 9e Variants
Q1 — How many variants are there overall?
A: There are 4 main trim levels; when you include battery (59/79 kWh) and three charger options, the complete lineup has 15 variants.
Q2 — What ranges can I expect?
A: Claimed ARAI ranges are 542 km for the 59 kWh pack and 656 km for the 79 kWh pack.
Q3 — Which variant has which battery?
A: Pack One = 59 kWh only; Pack Two = 59 kWh & 79 kWh; Pack Three Select = 59 kWh only; Pack Three = 79 kWh only.
Q4 — What are the charger choices and what do they mean?
A: Charger choices are No Charger (standard AC), 7.2 kW, and 11.2 kW onboard AC chargers. These are AC charging options — AC charging speed improves from NCH → 7.2 kW → 11.2 kW. DC fast-charging capabilities and speeds may vary by model/region — confirm with Mahindra or the dealer for exact DC charging specs.
Q5 — Which trim should I pick for the best value?
A: Pack Two is positioned as the best value—it offers both battery sizes and useful tech (HUD) without the full top-spec price.
Q6 — What ADAS and safety equipment are available?
A: Base safety includes 6 airbags, reverse camera, EPB, TPMS. Higher trims add HUD, blind-spot monitoring, 360° camera, Auto-Park Assist, and Level-2 ADAS on Pack Three.
Q7 — Does XEV 9e support single-pedal driving/regen?
A: Yes — multiple regenerative braking levels are offered, including a single-pedal drive mode; RWD is standard.
Q8 — What about suspension and ride comfort?
A: Lower trims use passive suspension (FDD & MTV-CL tech per brochure); Pack Three Select and Pack Three get intelligent adaptive suspension for improved ride and handling.
Q9 — Where can I confirm final specs, charging times, and warranty?
A: Final technical specs (DC charging rates, exact charge times, warranty terms, and pricing) can vary by market/region — always verify the latest official brochure or consult an authorized Mahindra dealer.
Related Articles:-