Overview
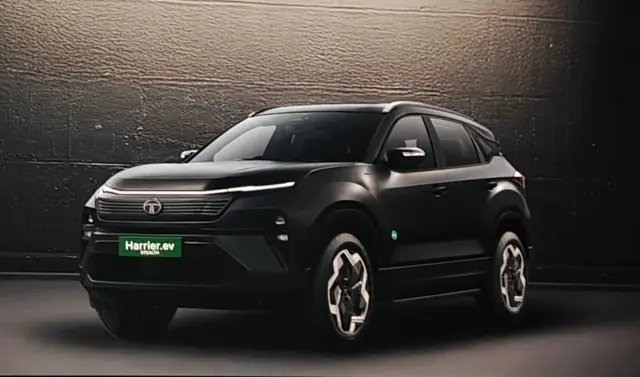
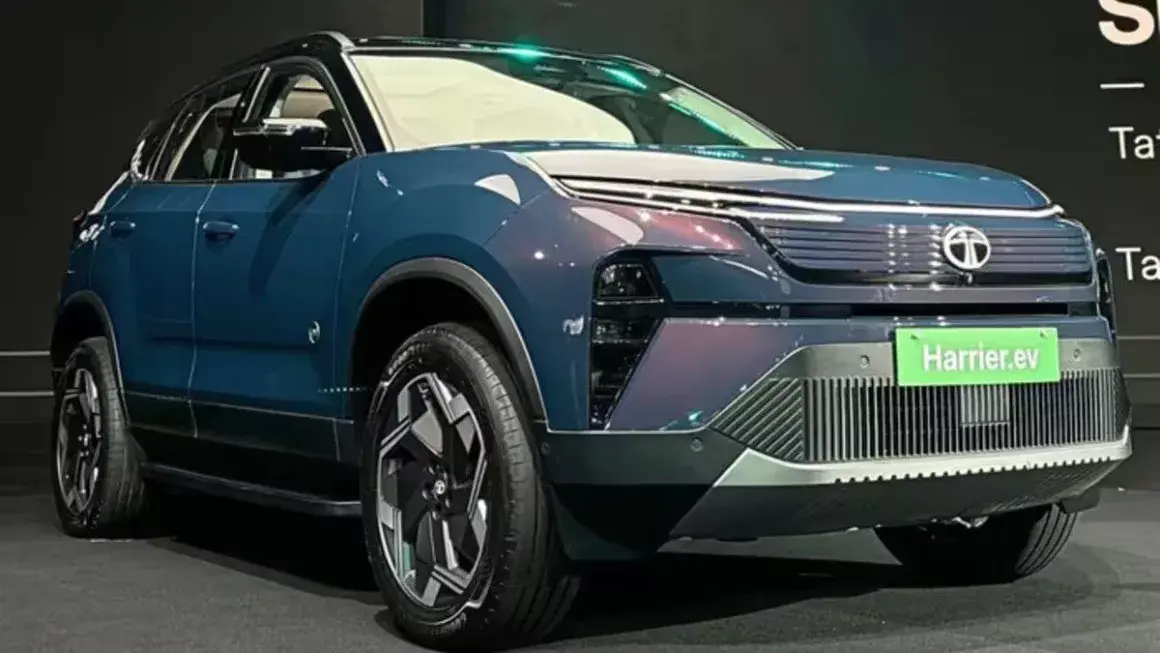
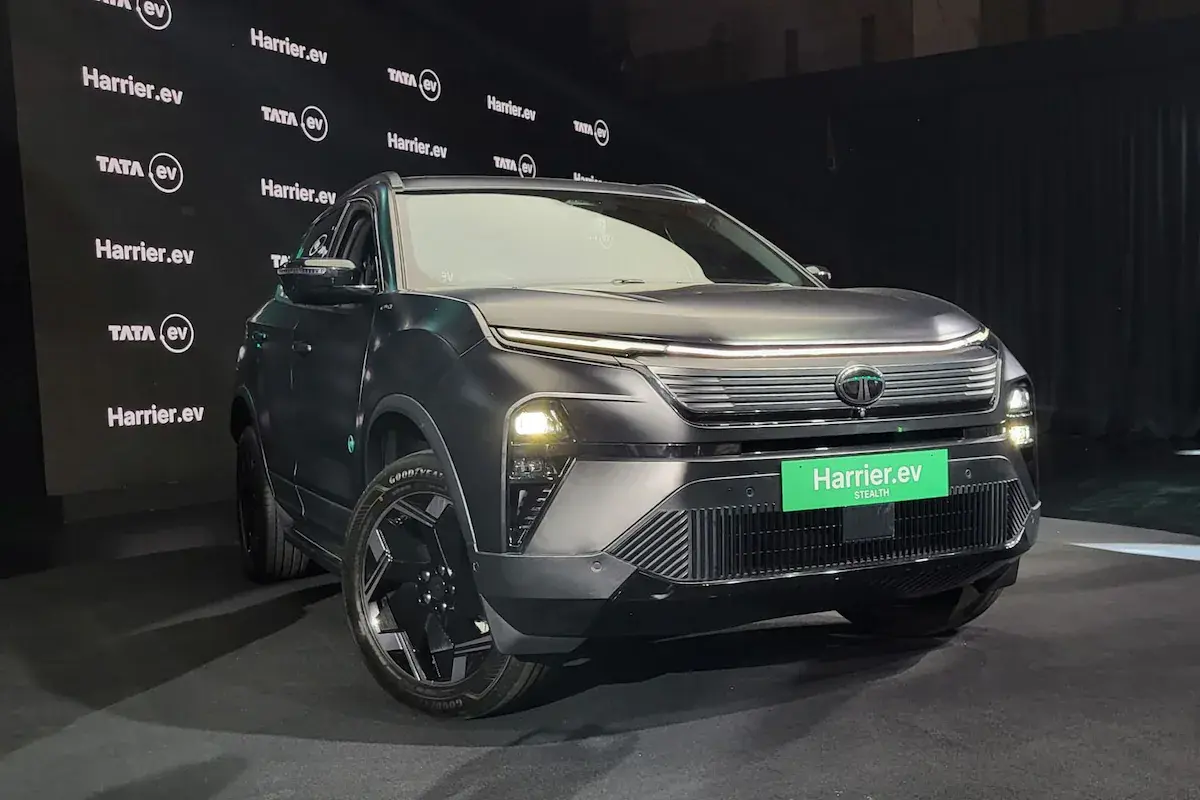
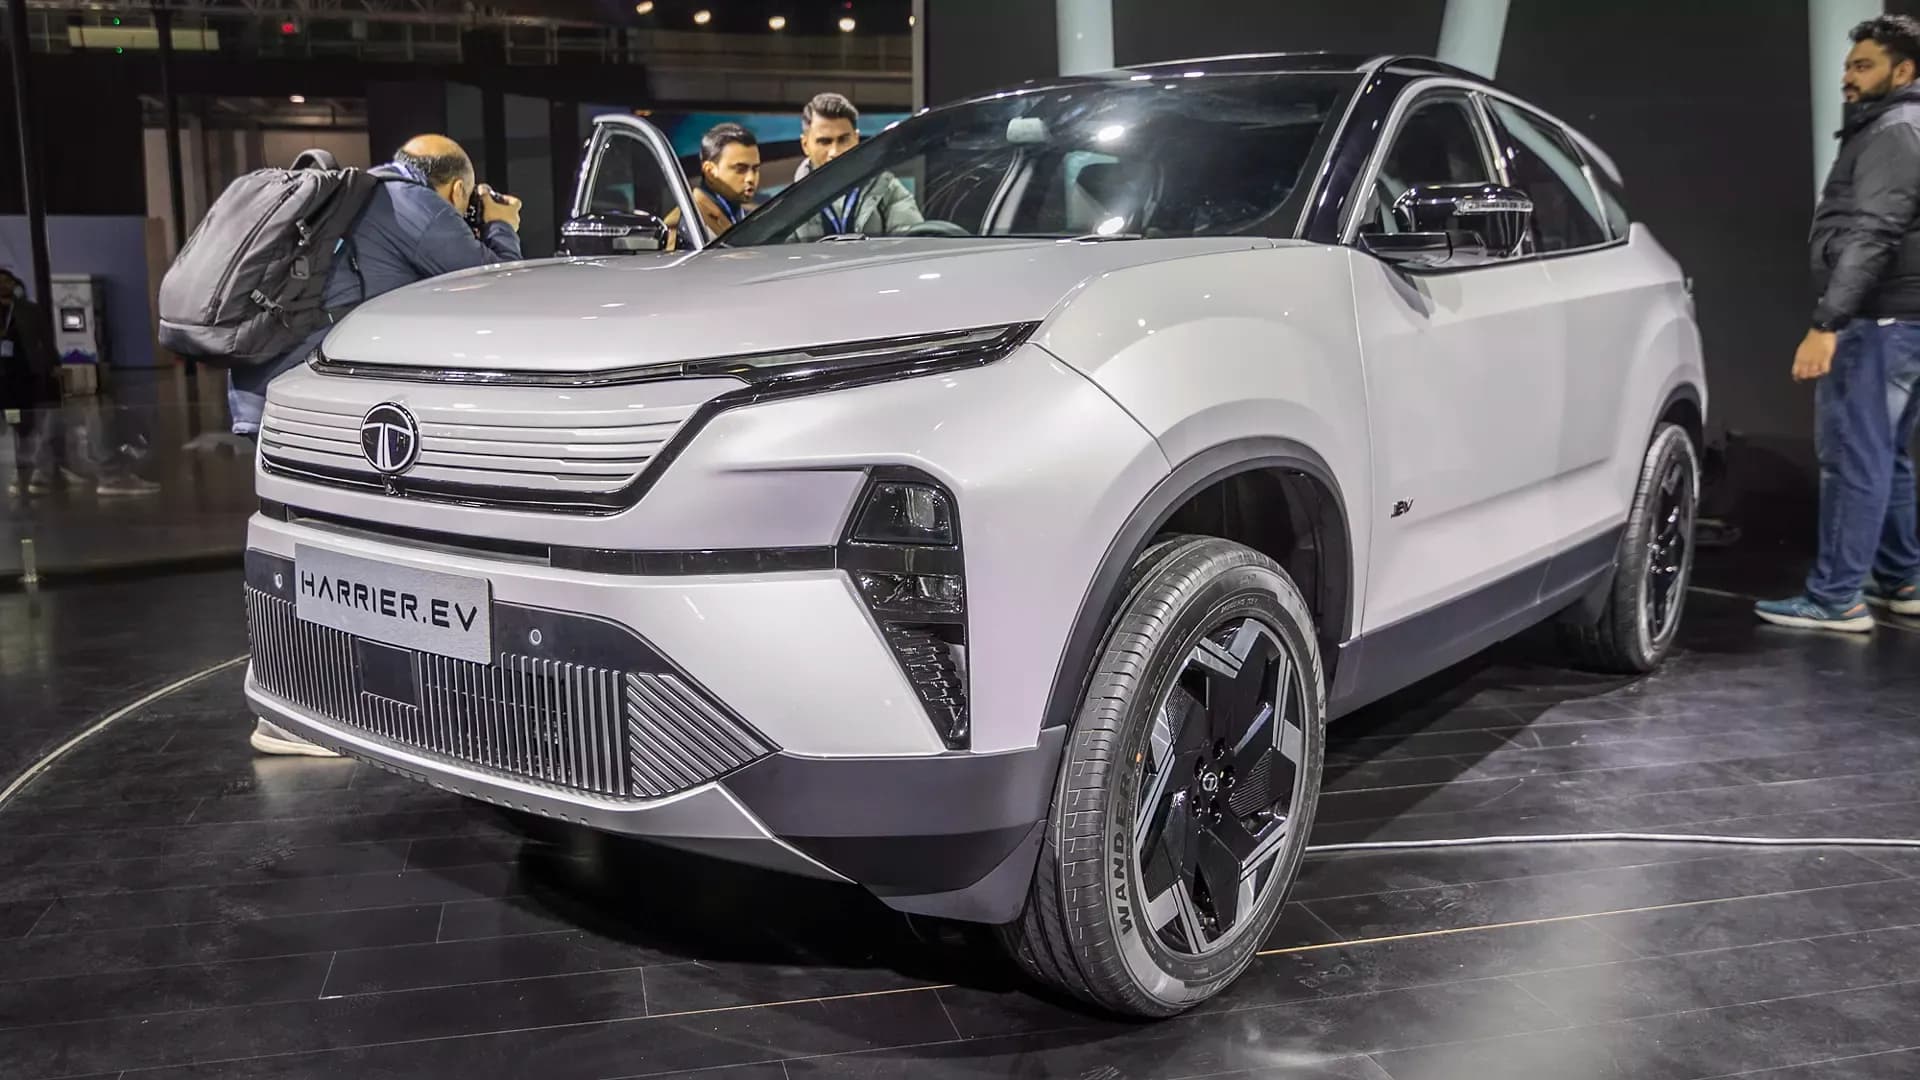
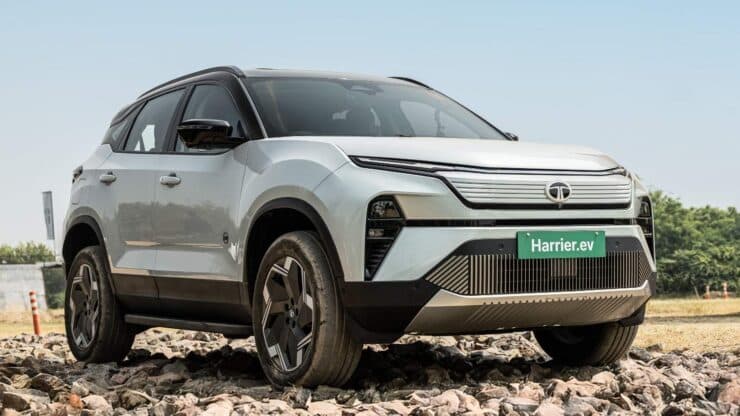
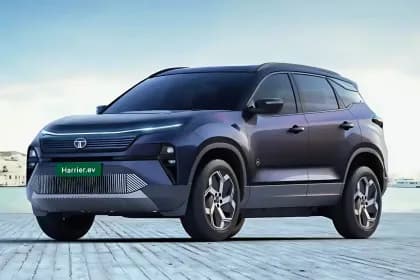
The Tata Harrier EV marks a significant leap for Tata Motors into the premium electric SUV segment. Launched on June 3, 2025, this all-electric, 5-seater midsize SUV is based on the advanced acti.ev+ platform and is engineered for performance, luxury, and sustainability.
Available in multiple variants such as Adventure 65, Fearless+ 65, Empowered 75, and Empowered 75 AWD, the Harrier EV is offered with either a 65 kWh or 75 kWh battery pack, delivering a claimed range of up to 627 km (MIDC).
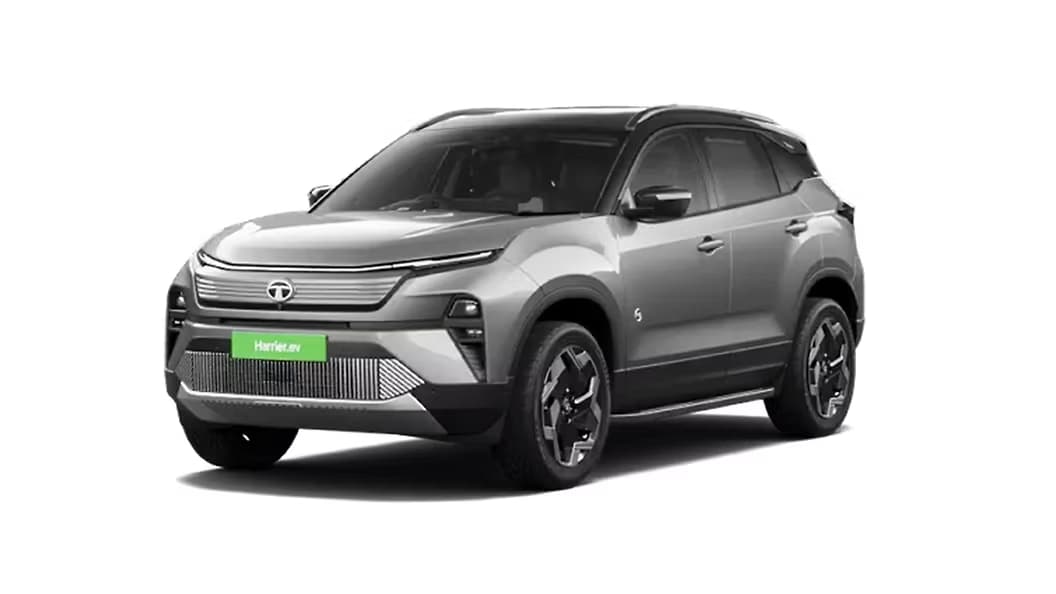
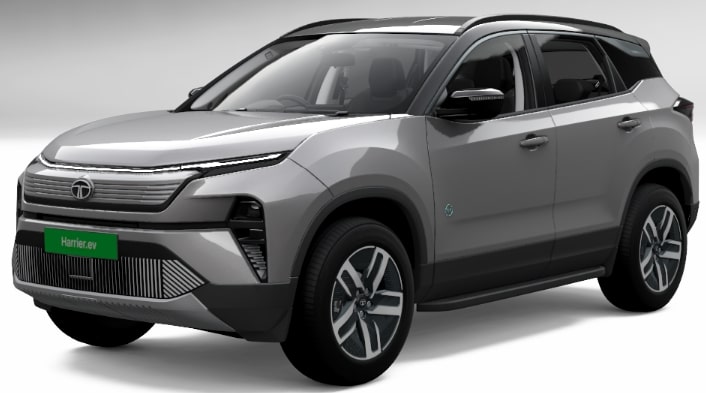
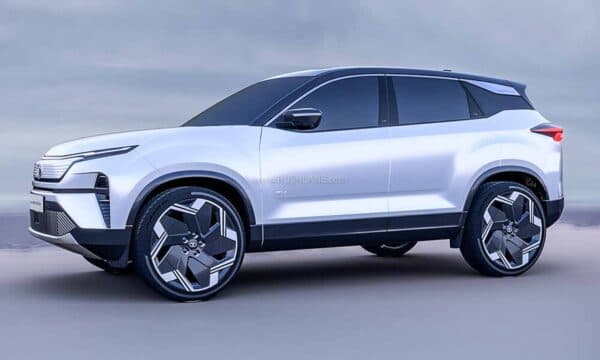
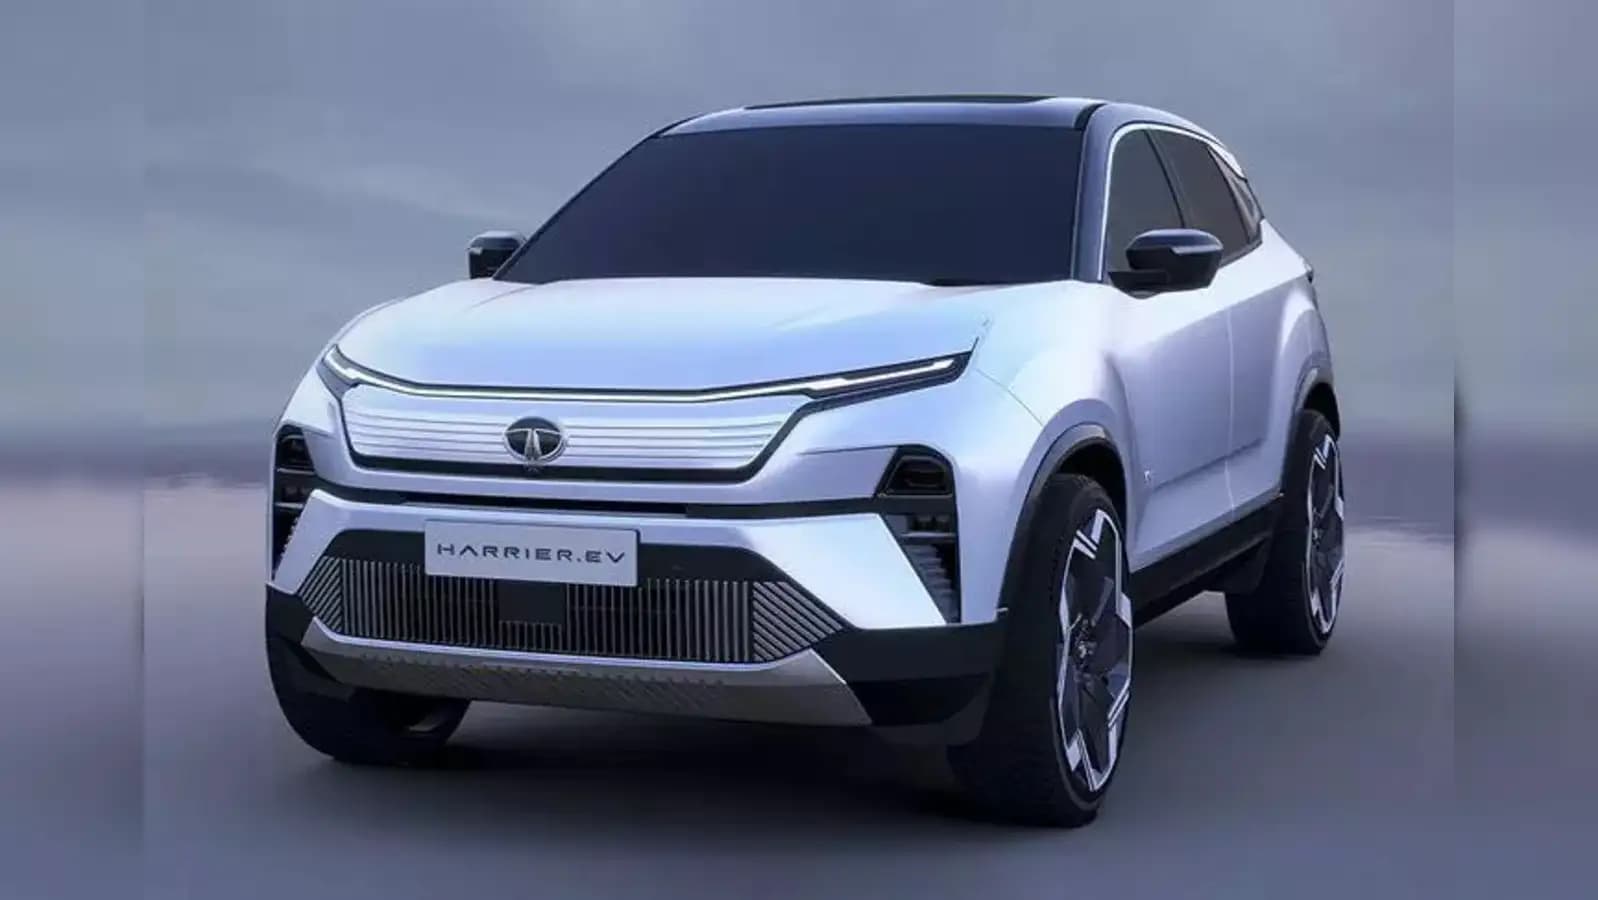
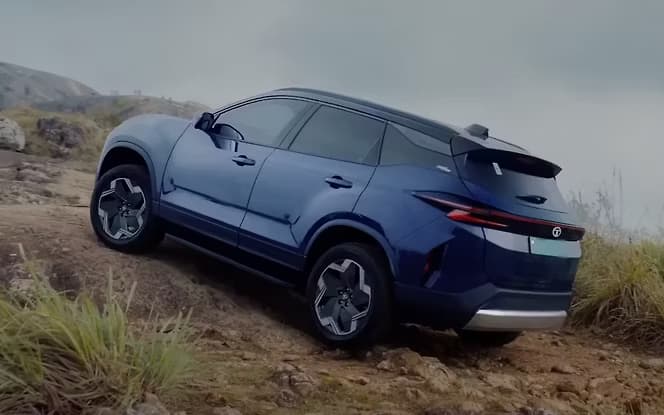
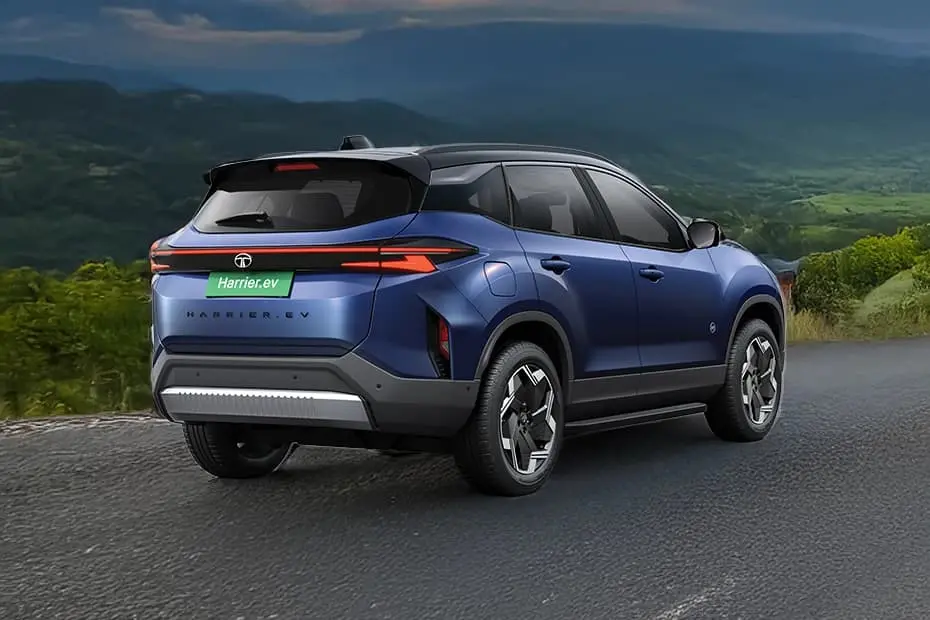
Design-wise, it retains the muscular and bold appeal of the standard Harrier but introduces EV-specific enhancements like a closed front grille, aero-optimized alloy wheels, and unique badging. Inside, it features high-end tech including a 14.5-inch Neo QLED infotainment display, Dolby Atmos sound system, panoramic sunroof, and Level 2 ADAS safety features.
Whether you’re seeking off-road capability with Quad Wheel Drive (QWD) or everyday practicality with Rear-Wheel Drive (RWD), the Harrier EV blends cutting-edge performance with a spacious, feature-rich cabin, making it a compelling choice in India’s growing EV landscape.

Pros & Cons
| Pros | Cons |
|---|---|
| Impressive 627 km claimed range (75 kWh) | Real-world range may vary significantly |
| Dual-motor AWD with Boost Mode for quick acceleration (0-100 in 6.3s) | Higher variants priced on the premium side |
| Level 2 ADAS and 540° surround view with transparent mode | Limited fast-charging infrastructure in some regions |
| Loaded interior with 14.5″ QLED display, JBL Dolby Atmos sound | Slightly heavy curb weight due to battery pack |
| Premium design with EV-specific enhancements | Limited third-party service support outside major cities |
Feature Highlights
Here are the 5 most important features of the Tata Harrier EV that set it apart:
1. Extended Driving Range
- With two battery options (65 kWh & 75 kWh), the Harrier EV boasts a claimed range of 538 to 627 km, making it ideal for both city and highway drives. Real-world estimates range between 480–505 km.
2. Dual-Motor AWD with Boost Mode
- The top-end Empowered 75 AWD variant delivers 390 bhp and 504 Nm torque, accelerating from 0 to 100 km/h in just 6.3 seconds. Includes 6 terrain modes and Off-Road Assist.
3. Next-Level Safety
- 5-star Bharat NCAP safety rating with features like Level 2 ADAS, 6 or 7 airbags, 540° view camera with transparent mode, and Driver Attention Alert ensure peace of mind.
4. Luxury-Infused Cabin
- Comes with a 14.5″ Neo QLED touchscreen, 10.25″ digital cluster, ventilated memory front seats, dual-zone climate control, panoramic sunroof, and more.
5. Fast Charging Capabilities
- Compatible with 3.3 kW & 7.2 kW AC home chargers and 120 kW DC fast charging. Fast charging can add 250 km range in just 15 minutes, and 20–80% in 25 minutes.
|  |  |  |  |  |  |  |  |  |  |  |  |  |  |  | |
| Name | Tata Harrier EV | Tata Harrier EV | Tata Harrier EV | Tata Harrier EV | Tata Harrier EV | Tata Harrier EV | Tata Harrier EV | Tata Harrier EV | Tata Harrier EV | Tata Harrier EV | Tata Harrier EV | Tata Harrier EV | Tata Harrier EV | Tata Harrier EV | Tata Harrier EV | Tata Harrier EV |
| Model | Empowered 75 kWh | Adventure (Base Model) 65 KWh | Adventure 65 KWh ACFC | Adventure S 65 KWh | Adventure S 65 KWh ACFC | Fearless plus 65 KWh | Fearless plus 65 KWh ACFC | Fearless plus 75KWh | Fearless plus 75KWh ACFC | Empowered QWD 75KWh | Empowered QWD 75KWh ACFC | Empowered QWD ST 75KWh | Empowered QWD ST 75KWh ACFC | Empowered ACFC 75 kWh | Empowered ST ACFC 75 kWh | Empowered ST 75 kWh |
| Year | 2025 | 2025 | 2025 | 2025 | 2025 | 2025 | 2025 | 2025 | 2025 | 2025 | 2025 | 2025 | 2025 | 2025 | 2025 | 2025 |
| Price | ₹27,49,000 | ₹21,49,000 | ₹21,98,000 | ₹21,99,000 | ₹22,48,000 | ₹23,99,000 | ₹24,48,000 | ₹24,99,000 | ₹25,48,000 | ₹28,99,000 | ₹29,48,000 | ₹29,74,000 | ₹30,23,000 | ₹27,98,000 | ₹28,73,000 | ₹28,24,000 |
Charging Info ⯆ | ||||||||||||||||
| AC charging time (0-100% SoC) | Approx. 10.7 hr. with 7.2 KW charger | Approx. 10.7 hours with a 7.2 kW charger | Approx. 10.7 hours with a 7.2 kW charger | Approx. 10.7 hours with a 7.2 kW charger | Approx. 10.7 hours with a 7.2 kW charger | Approx. 10.7 hours with a 7.2 kW charger | Approx. 10.7 hours with a 7.2 kW charger | Approx. 10.7 hours with a 7.2 kW charger | Approx. 10.7 hours with a 7.2 kW charger | Approx. 10.7 hours with a 7.2 kW charger | Approx. 10.7 hours with a 7.2 kW charger | Approx. 10.7 hours with a 7.2 kW charger | Approx. 10.7 hours with a 7.2 kW charger | Approx. 10.7 hr. with 7.2 KW charger | Approx. 10.7 hr. with 7.2 KW charger | Approx. 10.7 hr. with 7.2 KW charger |
| DC charging time (0-100% SoC) | 25Min-120 kW(20-80%) | 25Min-120 kW(20-80%) | 25Min-120 kW(20-80%) | 25Min-120 kW(20-80%) | ||||||||||||
| Charging Port | CCS-II | CCS‑2 | CCS‑2 | CCS‑2 | CCS‑2 | CCS‑2 | CCS‑2 | CCS‑2 | CCS‑2 | CCS‑2 | CCS‑2 | CCS‑2 | CCS‑2 | CCS-II | CCS-II | CCS-II |
| Charging Options | AC home charging via 7.2 kW wall box & DC fast charging up to 120 kW CCS2 | AC home charging via 7.2 kW wall box & DC fast charging up to 120 kW CCS2 | AC home charging via 7.2 kW wall box & DC fast charging up to 120 kW CCS2 | AC home charging via 7.2 kW wall box & DC fast charging up to 120 kW CCS2 | AC home charging via 7.2 kW wall box & DC fast charging up to 120 kW CCS2 | AC home charging via 7.2 kW wall box & DC fast charging up to 120 kW CCS2 | 3.3 kW portable charging cable, AC home charging via 7.2 kW wall box & DC fast charging up to 120 kW CCS2 | 3.3 kW portable charging cable, AC home charging via 7.2 kW wall box & DC fast charging up to 120 kW CCS2 | 3.3 kW portable charging cable, AC home charging via 7.2 kW wall box & DC fast charging up to 120 kW CCS2 | 3.3 kW portable charging cable, AC home charging via 7.2 kW wall box & DC fast charging up to 120 kW CCS2 | 3.3 kW portable charging cable, AC home charging via 7.2 kW wall box & DC fast charging up to 120 kW CCS2 | 3.3 kW portable charging cable, AC home charging via 7.2 kW wall box & DC fast charging up to 120 kW CCS2 | 120 kW DC charger & 7.2 kW AC charger | 120 kW DC charger & 3.3 kW portable charging cable | 120 kW DC charger & 3.3 kW portable charging cable | |
| Charging Time (15/16 A Plug Point) | ||||||||||||||||
| Wireless Mobile Charging | ||||||||||||||||
| AC Portable Charger | 15 A/3.3 kW charger | 15 A/3.3 kW charger | 15 A/3.3 kW charger | 15 A/3.3 kW charger | 15 A/3.3 kW charger | 15 A/3.3 kW charger | 15 A/3.3 kW charger | 15 A/3.3 kW charger | 15 A/3.3 kW charger | 15 A/3.3 kW charger | 15 A/3.3 kW charger | 15 A/3.3 kW charger | Yes, 7.2 kW | Yes, 7.2 kW | Yes, 7.2 kW | |
| Home Charger | 7.2 kW AC wall box charger | 7.2 kW AC wall box charger | 7.2 kW AC wall box charger | 7.2 kW AC wall box charger | 7.2 kW AC wall box charger | 7.2 kW AC wall box charger | 7.2 kW AC wall box charger | 7.2 kW AC wall box charger | 7.2 kW AC wall box charger | 7.2 kW AC wall box charger | 7.2 kW AC wall box charger | 7.2 kW AC wall box charger | ||||
| Charging Limiter | ||||||||||||||||
| Scheduled Charging & Scheduled Cabin Conditioning | ||||||||||||||||
| AC charging time (0-80% SoC) | Approx. 7.4 h on 7.2 kW AC | Approx. 7.4 h on 7.2 kW AC | Approx. 7.4 h on 7.2 kW AC | Approx. 7.4 h on 7.2 kW AC | Approx. 7.4 h on 7.2 kW AC | Approx. 7.4 h on 7.2 kW AC | Approx. 7.4 h on 7.2 kW AC | Approx. 7.4 h on 7.2 kW AC | Approx. 7.4 h on 7.2 kW AC | Approx. 7.4 h on 7.2 kW AC | Approx. 7.4 h on 7.2 kW AC | Approx. 7.4 h on 7.2 kW AC | ||||
| AC charging time (20-80% SoC) | ||||||||||||||||
| DC charging time (20-80% SoC) | Approx. 25 minutes with a 100 kW charger. | Approx. 25 minutes with a 100 kW charger. | Approx. 25 minutes with a 100 kW charger. | Approx. 25 minutes with a 100 kW charger. | Approx. 25 minutes with a 100 kW charger. | Approx. 25 minutes with a 100 kW charger. | Approx. 25 minutes with a 120 kW charger. | Approx. 25 minutes with a 120 kW charger. | Approx. 25 minutes with a 120 kW charger. | Approx. 25 minutes with a 120 kW charger. | Approx. 25 minutes with a 120 kW charger. | Approx. 25 minutes with a 120 kW charger. | ||||
| DC charging time (0-80% SoC) | ||||||||||||||||
| Charger type / charging standard | ||||||||||||||||
| DC charging time (10-80% SoC) | ||||||||||||||||
Warranty ⯆ | ||||||||||||||||
| Battery Warranty | Lifetime Warranty and Unlimited Kilometers | 10 years or 200,000 km | 10 years or 200,000 km | 10 years or 200,000 km | 10 years or 200,000 km | 10 years or 200,000 km | 10 years or 200,000 km | 10 years or 200,000 km | 10 years or 200,000 km | 10 years or 200,000 km | 10 years or 200,000 km | 10 years or 200,000 km | 10 years or 200,000 km | Lifetime Warranty and Unlimited Kilometers | Lifetime Warranty and Unlimited Kilometers | Lifetime Warranty and Unlimited Kilometers |
| Motor Warranty | 8 years or up to 160,000 km | 8 years or up to 160,000 km | 8 years or up to 160,000 km | 8 years or up to 160,000 km | 8 years or up to 160,000 km | 8 years or up to 160,000 km | 8 years or up to 160,000 km | 8 years or up to 160,000 km | 8 years or up to 160,000 km | 8 years or up to 160,000 km | 8 years or up to 160,000 km | 8 years or up to 160,000 km | ||||
| Vehicle Warranty | 3 years or 125,000 km | 3 years or 125,000 km | 3 years or 125,000 km | 3 years or 125,000 km | 3 years or 125,000 km | 3 years or 125,000 km | 3 years or 125,000 km | 3 years or 125,000 km | 3 years or 125,000 km | 3 years or 125,000 km | 3 years or 125,000 km | 3 years or 125,000 km | ||||
| Tyre Warranty | ||||||||||||||||
| Home Charger Warranty | ||||||||||||||||
| Portable Charger Warranty | ||||||||||||||||
Learn More ⯆ | ||||||||||||||||
| Read more | ||||||||||||||||
| Watch Video | ||||||||||||||||
Pricing ⯆ | ||||||||||||||||
| Ex Showroom Price | 2749000 | 2149000 | 2198000 | 2199000 | 2248000 | 2399000 | 2448000 | 2499000 | 2548000 | 2899000 | 2948000 | 2974000 | 3023000 | 2798000 | 2873000 | 2824000 |
Comfort & Convenience ⯆ | ||||||||||||||||
| Push Start | ||||||||||||||||
| Frunk Space (litres) | 35 L | 67 L | 67 L | 67 L | 67 L | 67 L | 67 L | 67 L | 67 L | 67 L | 67 L | 67 L | 67 L | |||
| Boot Space (litres) | 502 L | 502 L | 502 L | 502 L | 502 L | 502 L | 502 L | 502 L | 502 L | 502 L | 502 L | 502 L | 502 L | 502 L | 502 L | 502 L |
| Auto Headlamps | ||||||||||||||||
| Rain Sensing Wipers | ||||||||||||||||
| 2nd row AC vents | ||||||||||||||||
| Seat Belt Adjustment | Front belts height-adjustable | Front belts height-adjustable | Front belts height-adjustable | Front belts height-adjustable | Front belts height-adjustable | Front belts height-adjustable | Front belts height-adjustable | Front belts height-adjustable | Front belts height-adjustable | Front belts height-adjustable | Front belts height-adjustable | Front belts height-adjustable | ||||
| Console Storage Cooling | ||||||||||||||||
| Seat Recline | Front | Front | Front | Front | Front | Front | Front | Front | Front | Front | Front | Front | ||||
| Auto AC | ||||||||||||||||
| Door Glass | Power – front only (rear manual) | Power – front only (rear manual) | Power – front only (rear manual) | Power – front only (rear manual) | Power – front only (rear manual) | Power – front only (rear manual) | Power – front only (rear manual) | Power – front only (rear manual) | Power – front only (rear manual) | Power – front only (rear manual) | Power – front only (rear manual) | Power – front only (rear manual) | Power | Power | Power | |
| Power Adjusted Driver Seat | 8 Way Seat Adjustable | 8 Way Seat Adjustable | 8 Way Seat Adjustable | 8 Way Seat Adjustable | 6 Way Seat Adjustable | 6 Way Seat Adjustable | 6 Way Seat Adjustable | 6 Way Seat Adjustable | 6 Way Seat Adjustable | 6 Way Seat Adjustable | 6 Way Seat Adjustable | 6 Way Seat Adjustable | Yes, 6-way electrically adjustable | Yes, 6-way electrically adjustable | Yes, 6-way electrically adjustable | |
| Power Adjusted Co-Driver Seat | 4 Way Seat Adjustable | 4 Way Seat Adjustable | 4 Way Seat Adjustable | 4 Way Seat Adjustable | 4 Way Seat Adjustable | 4 Way Seat Adjustable | 4 Way Seat Adjustable | 4 Way Seat Adjustable | 4 Way Seat Adjustable | 4 Way Seat Adjustable | 4 Way Seat Adjustable | 4 Way Seat Adjustable | Yes, 4-way electrically adjustable | Yes, 4-way electrically adjustable | Yes, 4-way electrically adjustable | |
| Electric adjust ORVM | ||||||||||||||||
| Power fold ORVM | ||||||||||||||||
| ORVM Auto Dip on Reverse | ||||||||||||||||
| Auto Dimming IRVM | ||||||||||||||||
| Ventilated Front Seats | ||||||||||||||||
| Ventilated Rear Seats | ||||||||||||||||
| Door Handles | Body-colored exterior door handles | Body-colored exterior door handles | Body-colored exterior door handles | Body-colored exterior door handles | Body-colored exterior door handles | Body-colored exterior door handles | Body-colored exterior door handles | Body-colored exterior door handles | Body-colored exterior door handles | Body-colored exterior door handles | ||||||
| Window Sun Shades | ||||||||||||||||
| One Touch Driver Power Window | ||||||||||||||||
| Parcel Shelf | ||||||||||||||||
| Front Row Arm Rest with Storage | ||||||||||||||||
| 2nd Row Arm Rest with Cup Holder | ||||||||||||||||
| Magzine Pockets for Rear Passengers | ||||||||||||||||
| Bottle Holder | ||||||||||||||||
| Umbrella Holder | ||||||||||||||||
| Heads Up Display (augmented reality HUD) | ||||||||||||||||
| 2nd Row Recline | ||||||||||||||||
| Soft Wrapped Dashboard & Door Trims | ||||||||||||||||
| Keep, Pet & Camp Modes (climate control) | 2 zone | 2 zone | 2 zone | 2 zone | 2 zone | 2 zone | ||||||||||
| Interior Device Charging Port | USB C ports front & rear | USB C ports front & rear | USB C ports front & rear | USB C ports front & rear | 65 W USB C ports front & rear | 65 W USB C ports front & rear | 65 W USB C ports front & rear | 65 W USB C ports front & rear | 65 W USB C ports front & rear | 65 W USB C ports front & rear | 65 W USB C ports front & rear | 65 W USB C ports front & rear | ||||
| Power Socket in Boot | ||||||||||||||||
| ISOFIX Rear Seats | ||||||||||||||||
| ESP | ESP with i-VBAC | ESP with i-VBAC | ESP with i-VBAC | ESP with i-VBAC | ||||||||||||
| Door Open Alert (DOA) | ||||||||||||||||
| Autonomous Emergency Steering (AES) | ||||||||||||||||
| Evasive Steering Assist (ESA) | ||||||||||||||||
| Emergency Lane Keep Assist | ||||||||||||||||
| Highway Assist (including driver initiated auto lane change) | ||||||||||||||||
| Rear Collision Warning (RCW) | ||||||||||||||||
Technology ⯆ | ||||||||||||||||
| Screen Size | 36.9cm Cinematic Infotainment Screen | 10.25‑inch touchscreen infotainment display | 10.25‑inch touchscreen infotainment display | 10.25‑inch touchscreen infotainment display | 10.25‑inch touchscreen infotainment display | 10.25‑inch touchscreen infotainment display | 10.25‑inch touchscreen infotainment display | 10.25‑inch touchscreen infotainment display | 10.25‑inch touchscreen infotainment display | 36.9 cm (14.53 inch) | 36.9 cm (14.53 inch) | 36.9 cm (14.53 inch) | 36.9 cm (14.53 inch) | 36.9cm Cinematic Infotainment Screen | 36.9cm Cinematic Infotainment Screen | 36.9cm Cinematic Infotainment Screen |
| Chipset & Memory | Qualcomm Snapdragon infotainment chipset | Qualcomm Snapdragon infotainment chipset | Qualcomm Snapdragon infotainment chipset | Qualcomm Snapdragon infotainment chipset | Qualcomm Snapdragon infotainment chipset | Qualcomm Snapdragon infotainment chipset | Qualcomm Snapdragon infotainment chipset | Qualcomm Snapdragon infotainment chipset | Qualcomm Snapdragon infotainment chipset | Qualcomm Snapdragon infotainment chipset | Qualcomm Snapdragon infotainment chipset | Qualcomm Snapdragon infotainment chipset | ||||
| Wireless Technology | Wireless Android Auto and wireless Apple CarPlay | Wireless Android Auto and wireless Apple CarPlay | Wireless Android Auto and wireless Apple CarPlay | Wireless Android Auto and wireless Apple CarPlay | Wireless Android Auto and wireless Apple CarPlay | Wireless Android Auto and wireless Apple CarPlay | Wireless Android Auto and wireless Apple CarPlay | Wireless Android Auto and wireless Apple CarPlay | Wireless Android Auto and wireless Apple CarPlay | Wireless Android Auto and wireless Apple CarPlay | Wireless Android Auto and wireless Apple CarPlay | Wireless Android Auto and wireless Apple CarPlay | ||||
| Connectivity | 5G | Bluetooth; USB‑C ports (45 W); in‑car internet via Tata’s iRA connected car platform | Bluetooth; USB‑C ports (45 W); in‑car internet via Tata’s iRA connected car platform | Bluetooth; USB‑C ports (45 W); in‑car internet via Tata’s iRA connected car platform | Bluetooth; USB‑C ports (45 W); in‑car internet via Tata’s iRA connected car platform | Bluetooth; USB‑C ports (45 W); in‑car internet via Tata’s iRA connected car platform | Bluetooth; USB‑C ports (45 W); in‑car internet via Tata’s iRA connected car platform | Bluetooth; USB‑C ports (45 W); in‑car internet via Tata’s iRA connected car platform | Bluetooth; USB‑C ports (45 W); in‑car internet via Tata’s iRA connected car platform | Bluetooth; USB‑C ports (45 W); in‑car internet via Tata’s iRA connected car platform | Bluetooth; USB‑C ports (45 W); in‑car internet via Tata’s iRA connected car platform | Bluetooth; USB‑C ports (45 W); in‑car internet via Tata’s iRA connected car platform | Bluetooth; USB‑C ports (45 W); in‑car internet via Tata’s iRA connected car platform | 5G | 5G | 5G |
| Apps | 25+ apps | 25+ apps | 25+ apps | 25+ apps | ||||||||||||
| BYOD ( Bring your own Device) | ||||||||||||||||
| Connected Features | 55+ connected car features like car location tracking, locate charge point aggregators, remote operations etc. | Telematics, OTA updates, remote diagnostics, vehicle status via app; connected LED tail‑bar lighting | Telematics, OTA updates, remote diagnostics, vehicle status via app; connected LED tail‑bar lighting | Telematics, OTA updates, remote diagnostics, vehicle status via app; connected LED tail‑bar lighting | Telematics, OTA updates, remote diagnostics, vehicle status via app; connected LED tail‑bar lighting | Telematics, OTA updates, remote diagnostics, vehicle status via app; connected LED tail‑bar lighting | Telematics, OTA updates, remote diagnostics, vehicle status via app; connected LED tail‑bar lighting | Telematics, OTA updates, remote diagnostics, vehicle status via app; connected LED tail‑bar lighting | Telematics, OTA updates, remote diagnostics, vehicle status via app; connected LED tail‑bar lighting | Telematics, OTA updates, remote diagnostics, vehicle status via app; connected LED tail‑bar lighting | Telematics, OTA updates, remote diagnostics, vehicle status via app; connected LED tail‑bar lighting | Telematics, OTA updates, remote diagnostics, vehicle status via app; connected LED tail‑bar lighting | Telematics, OTA updates, remote diagnostics, vehicle status via app; connected LED tail‑bar lighting | 55+ connected car features like car location tracking, locate charge point aggregators, remote operations etc. | 55+ connected car features like car location tracking, locate charge point aggregators, remote operations etc. | 55+ connected car features like car location tracking, locate charge point aggregators, remote operations etc. |
| Speakers | 10 | 4 speakers + 2 tweeters | 4 speakers + 2 tweeters | 4 speakers + 2 tweeters | 4 speakers + 2 tweeters | 10 Speaker System ( 4 Speakers + 4 Tweeters + 1 Central Speaker + 1 Subwoofer) | 10 Speaker System ( 4 Speakers + 4 Tweeters + 1 Central Speaker + 1 Subwoofer) | 10 Speaker System ( 4 Speakers + 4 Tweeters + 1 Central Speaker + 1 Subwoofer) | 10 Speaker System ( 4 Speakers + 4 Tweeters + 1 Central Speaker + 1 Subwoofer) | 10 Speaker System ( 4 Speakers + 4 Tweeters + 1 Central Speaker + 1 Subwoofer) | 10 Speaker System ( 4 Speakers + 4 Tweeters + 1 Central Speaker + 1 Subwoofer) | 10 Speaker System ( 4 Speakers + 4 Tweeters + 1 Central Speaker + 1 Subwoofer) | 10 Speaker System ( 4 Speakers + 4 Tweeters + 1 Central Speaker + 1 Subwoofer) | 10 | 10 | 10 |
| Dolby Atmos | JBL™ Black | JBL™ Black | JBL™ Black | JBL™ Black | ||||||||||||
| Voice Commands | ||||||||||||||||
| NFC Key | ||||||||||||||||
| Passive Keyless Entry (PKE) | ||||||||||||||||
| Auto Park | ||||||||||||||||
| Video calling with in-car camera | ||||||||||||||||
| AIR Purifier | Air purifier with AQI display | Air purifier with AQI display | Air purifier with AQI display | Air purifier with AQI display | ||||||||||||
| Internet Connectivity | ||||||||||||||||
| Power Tailgate with Gesture Control | ||||||||||||||||
| Tailgate Ajar Warning | ||||||||||||||||
| Vechicle to Vehicle Charging | ||||||||||||||||
| Vehicle to Load Charging | ||||||||||||||||
| Heater | ||||||||||||||||
| Follow Me Home Headlamps | ||||||||||||||||
| Memory Function Seats | ||||||||||||||||
| LightMeUp (ambient lights) | ||||||||||||||||
| OTA Updates (infotainment & maps) | ||||||||||||||||
| OTA Updates (vehicle features) | ||||||||||||||||
| OTA Updates (ePowertrain) | ||||||||||||||||
| Ecosense & Driving Analytics | ||||||||||||||||
| App Store | ||||||||||||||||
| Music & Calling Connectivity | ||||||||||||||||
Safety ⯆ | ||||||||||||||||
| Airbags | 7 Airbags – 6 airbags as standard & gets additional Knee Airbag. | 6 airbags (driver, front passenger, two side, two curtain) | 6 airbags (driver, front passenger, two side, two curtain) | 6 airbags (driver, front passenger, two side, two curtain) | 6 airbags (driver, front passenger, two side, two curtain) | 6 airbags with Knee Airbag | 6 airbags with Knee Airbag (7 Airbags) | 6 airbags with Knee Airbag | 6 airbags with Knee Airbag | 6 airbags with Knee Airbag | 6 airbags with Knee Airbag | 6 airbags with Knee Airbag | 6 airbags with Knee Airbag | 7 Airbags – 6 airbags as standard & gets additional Knee Airbag. | 7 Airbags – 6 airbags as standard & gets additional Knee Airbag. | 7 Airbags – 6 airbags as standard & gets additional Knee Airbag. |
| Body Shell | Unibody/Monocoque frame | Unibody/Monocoque frame | Unibody/Monocoque frame | Unibody/Monocoque frame | Unibody/Monocoque frame | Unibody/Monocoque frame | Unibody/Monocoque frame | Unibody/Monocoque frame | Unibody/Monocoque frame | Unibody/Monocoque frame | Unibody/Monocoque frame | Unibody/Monocoque frame | ||||
| Front Brake Type | Disc Brakes | Disc brakes | Disc brakes | Disc brakes | Disc brakes | Disc brakes | Disc brakes | Disc brakes | Disc brakes | Disc brakes | Disc brakes | Disc brakes | Disc brakes | Disc Brakes | Disc Brakes | Disc Brakes |
| Rear Brake Type | Disc Brakes | Disc brakes | Disc brakes | Disc brakes | Disc brakes | Disc brakes | Disc brakes | Disc brakes | Disc brakes | Disc brakes | Disc brakes | Disc brakes | Disc brakes | Disc Brakes | Disc Brakes | Disc Brakes |
| Brake Technology | Disc Brakes with brake disc wiping | ABS with EBD | ABS with EBD | ABS with EBD | ABS with EBD | ABS with EBD | ABS with EBD | ABS with EBD | ABS with EBD | ABS with EBD | ABS with EBD | ABS with EBD | ABS with EBD | Disc Brakes with brake disc wiping | Disc Brakes with brake disc wiping | Disc Brakes with brake disc wiping |
| EyeDentity (driver & occupant Monitoring) | ||||||||||||||||
| EPB (electric park brake) | ||||||||||||||||
| Rear Parking Sensor | ||||||||||||||||
| Front Parking Sensor | ||||||||||||||||
| Radar | ||||||||||||||||
| Reverse Camera | ||||||||||||||||
| Tyre Pressure Monitoring | ||||||||||||||||
| Fog Lamps | LED fog lamp | LED fog lamp | LED fog lamp | LED fog lamp | ||||||||||||
| Cornering Lamps | LED | LED | LED | LED | ||||||||||||
| Auto Headlamps | ||||||||||||||||
| Auto Booster Lamps | ||||||||||||||||
| 360 Degree Camera | 540° Surround View | Yes, 3D | Yes, 3D | Yes, 3D | Yes, 3D | 540° View (Transparent Mode (180°) + 360° SVS) | 540° View (Transparent Mode (180°) + 360° SVS) | 540° View (Transparent Mode (180°) + 360° SVS) | 540° View (Transparent Mode (180°) + 360° SVS) | 540° Surround View | 540° Surround View | 540° Surround View | ||||
| Blind Spot Monitor | ||||||||||||||||
| Secure 360 - Live View & Recording | ||||||||||||||||
| Rear Defogger | ||||||||||||||||
| Windshield Auto Defogging | ||||||||||||||||
| Central Locking | ||||||||||||||||
| Child Safety Locks | ||||||||||||||||
| Anti-lock Braking System (ABS) | ||||||||||||||||
| Brake Assist | ||||||||||||||||
| ADAS | Level 2 : 20+ ADAS Features | Yes, Level 2 | Yes, Level 2 | Yes, Level 2 | Yes, Level 2 | Yes, Level 2 | Yes, Level 2 | Yes, Level 2 | Yes, Level 2 | Yes, Level 2 | Yes, Level 2 | Yes, Level 2 | Yes, Level 2 | Level 2 : 20+ ADAS Features | Level 2 : 20+ ADAS Features | Level 2 : 20+ ADAS Features |
| Forward Collision Warning System (FCW) | ||||||||||||||||
| Automatic Emergency Braking System (AEB) | ||||||||||||||||
| Lane Departure Warning System (LDW) | ||||||||||||||||
| Lane Keep Assist System (LKA) | ||||||||||||||||
| Lane Sway Alert (LSA) | ||||||||||||||||
| Lane Centering Function (LCF) | ||||||||||||||||
| Traffic Sign Recognition (TSR) | ||||||||||||||||
| Front Vehicle Start Alert (FVSA) | ||||||||||||||||
| Adaptive Cruise Control (ACC) | ||||||||||||||||
| Intelligent Adaptive Cruise Control (iACC) | ||||||||||||||||
| Smart Pilot Assist (SPA) | ||||||||||||||||
| Risk Mitigation Support | ||||||||||||||||
| High Beam Assist (HBA) | ||||||||||||||||
| Forward Cross Traffic Alert (FCTA) | ||||||||||||||||
| Rear Cross Traffic Alert (RCTA) | ||||||||||||||||
| Find My Car | ||||||||||||||||
| Geo-Fencing | ||||||||||||||||
| Live Location Sharing & Tracking | ||||||||||||||||
Design ⯆ | ||||||||||||||||
| Driving Space | ||||||||||||||||
| Illuminated Logo | ||||||||||||||||
| Headlamps & DRL | LED Bi-projector | Bi‑LED projector headlights with LED DRLs | Bi‑LED projector headlights with LED DRLs | Bi‑LED projector headlights with LED DRLs | Bi‑LED projector headlights with LED DRLs | Bi‑LED projector headlights with LED DRLs | Bi‑LED projector headlights with LED DRLs | Bi‑LED projector headlights with LED DRLs | Bi‑LED projector headlights with LED DRLs | Bi‑LED projector headlights with LED DRLs | Bi‑LED projector headlights with LED DRLs | Bi‑LED projector headlights with LED DRLs | Bi‑LED projector headlights with LED DRLs | LED Bi-projector | LED Bi-projector | LED Bi-projector |
| Tail Lamps | LED Tail lamps | LED tail lamps | LED tail lamps | LED tail lamps | LED tail lamps | LED tail lamps | LED tail lamps | LED tail lamps | LED tail lamps | LED tail lamps | LED tail lamps | LED tail lamps | LED tail lamps | LED Tail lamps | LED Tail lamps | LED Tail lamps |
| Upholstery | Leatherette seat upholstery | Leatherette seats | Leatherette seats | Leatherette seats | Leatherette seats | Leatherette seats | Leatherette seats | Leatherette seats | Leatherette seats | Leatherette seats | Leatherette seats | Leatherette seats | Leatherette seats | Leatherette seat upholstery | Leatherette seat upholstery | Leatherette seat upholstery |
| Wheels | Alloy Wheels | R18 Alloy Wheels | R18 Alloy Wheels | R18 Alloy Wheels | R18 Alloy Wheels | R19 Alloy Wheels with Aero Inserts | R19 Alloy Wheels with Aero Inserts | R19 Alloy Wheels with Aero Inserts | R19 Alloy Wheels with Aero Inserts | R19 Alloy Wheels with Aero Inserts | R19 Alloy Wheels with Aero Inserts | R19 Alloy Wheels with Aero Inserts | R19 Alloy Wheels with Aero Inserts | Alloy Wheels | Alloy Wheels | Alloy Wheels |
| Spare Wheel | ||||||||||||||||
| Cladding | ||||||||||||||||
| Sunroof | Panoramic Sunroof | Voice Assisted Panoramic Sunroof | Voice Assisted Panoramic Sunroof | Voice Assisted Panoramic Sunroof | Voice Assisted Panoramic Sunroof | Voice Assisted Panoramic Sunroof | Voice Assisted Panoramic Sunroof | Voice Assisted Panoramic Sunroof | Voice Assisted Panoramic Sunroof | Voice Assisted Panoramic Sunroof | Voice Assisted Panoramic Sunroof | Panoramic Sunroof | Panoramic Sunroof | Panoramic Sunroof | ||
| Stearing Wheel | Multi-function Steering Wheel | Leather‑wrapped, 4‑spoke steering | Leather‑wrapped, 4‑spoke steering | Leather‑wrapped, 4‑spoke steering | Leather‑wrapped, 4‑spoke steering | Leather‑wrapped, 4‑spoke steering | Leather‑wrapped, 4‑spoke steering | Leather‑wrapped, 4‑spoke steering | Leather‑wrapped, 4‑spoke steering | Leather‑wrapped, 4‑spoke steering | Leather‑wrapped, 4‑spoke steering | Leather‑wrapped, 4‑spoke steering | Leather‑wrapped, 4‑spoke steering | Multi-function Steering Wheel | Multi-function Steering Wheel | Multi-function Steering Wheel |
| Cap Touch Switches | ||||||||||||||||
| Steering Wheel & E-shifter | ||||||||||||||||
| Mood Lighting | Multi-color ambient light | Multi-color ambient light | Multi-color ambient light | Multi-color ambient light | ||||||||||||
| Night Trail - Carpet Lamps | ||||||||||||||||
| Sequential Turn Indicators | ||||||||||||||||
| Start Up / Good bye Animations | ||||||||||||||||
| Center Tail Lamp with Animations | ||||||||||||||||
| Integrated Antenna | Shark Fin | Shark Fin | Shark Fin | Shark Fin | Shark Fin | Shark Fin | Shark Fin | Shark Fin | Shark Fin | Shark Fin | Shark Fin | Shark Fin | Shark Fin | Shark Fin | ||
| Length (mm) | 4607 mm | 4,607 | 4,607 | 4,607 | 4,607 | 4,607 | 4,607 | 4,607 | 4,607 | 4,607 | 4,607 | 4,607 | 4,607 | 4607 mm | 4607 mm | 4607 mm |
| Width (mm) | 2132 mm | 2,132 | 2,132 | 2,132 | 2,132 | 2,132 | 2,132 | 2,132 | 2,132 | 2,132 | 2,132 | 2,132 | 2,132 | 2132 mm | 2132 mm | 2132 mm |
| Height (mm) | 1740 mm | 1,740 mm | 1,740 mm | 1,740 mm | 1,740 mm | 1,740 mm | 1,740 mm | 1,740 mm | 1,740 mm | 1,740 mm | 1,740 mm | 1,740 mm | 1,740 mm | 1740 mm | 1740 mm | 1740 mm |
| Wheelbase (mm) | 2741 mm | 2,741 mm | 2,741 mm | 2,741 mm | 2,741 mm | 2,741 mm | 2,741 mm | 2,741 mm | 2,741 mm | 2,741 mm | 2,741 mm | 2,741 mm | 2,741 mm | 2741 mm | 2741 mm | 2741 mm |
| Ground Clearance (mm) | 205 mm | 205 mm | 205 mm | 205 mm | 205 mm | 205 mm | 205 mm | 205 mm | 205 mm | 205 mm | 205 mm | 205 mm | 205 mm | 205 mm | 205 mm | |
| Vanity Mirror | ||||||||||||||||
| Rear Reading Lamp | ||||||||||||||||
| Rear Seat Headrest | ||||||||||||||||
| Cup Holders | ||||||||||||||||
| Digital Cluster | 10.25‑inch digital driver display | 10.25‑inch digital driver display | 10.25‑inch digital driver display | 10.25‑inch digital driver display | 10.25‑inch digital driver display | 10.25‑inch digital driver display | 10.25‑inch digital driver display | 10.25‑inch digital driver display | 10.25‑inch digital driver display | 10.25‑inch digital driver display | 10.25‑inch digital driver display | 10.25‑inch digital driver display | 10.25-inch | 10.25-inch | 10.25-inch | |
| Body Type | SUV | SUV | SUV | SUV | SUV | SUV | SUV | SUV | SUV | SUV | SUV | SUV | SUV | SUV | SUV | SUV |
| Seating Capacity | 5 | 5 | 5 | 5 | 5 | 5 | 5 | 5 | 5 | 5 | 5 | 5 | 5 | 5 | 5 | 5 |
| No. of Doors | 5 | 5 | 5 | 5 | 5 | 5 | 5 | 5 | 5 | 5 | 5 | 5 | 5 | 5 | 5 | 5 |
| Rear Spoiler | ||||||||||||||||
| Electrically Deployed Front Door Handles | ||||||||||||||||
| Premium Finish Exterior Cladding | ||||||||||||||||
| Rear Seating Dimensions L× W (inch.) | ||||||||||||||||
| Front Seating Dimensions L× W (inch.) | ||||||||||||||||
Performance ⯆ | ||||||||||||||||
| Battery Type | Lithium-ion High-Capacity Battery | Lithium‑ion | Lithium‑ion | Lithium‑ion | Lithium‑ion | Lithium‑ion | Lithium‑ion | Lithium‑ion | Lithium‑ion | Lithium‑ion | Lithium‑ion | Lithium‑ion | Lithium‑ion | Lithium-ion High-Capacity Battery | Lithium-ion High-Capacity Battery | Lithium-ion High-Capacity Battery |
| Battery Pack | 75 KW | 65 KWh | 65 KWh | 65 KWh | 65 KWh | 65 KWh | 65 KWh | 75 KWh | 75 KWh | 75 KWh | 75 KWh | 75 KWh | 75 KWh | 75 KW | 75 KW | 75 KW |
| Electric Motor Type | Permanent Magnet Synchronous Motor | Single Permanent Magnet Synchronous (175.24 kW electric motor) | Single Permanent Magnet Synchronous (175.24 kW electric motor) | Single Permanent Magnet Synchronous (175.24 kW electric motor) | Single Permanent Magnet Synchronous (175.24 kW electric motor) | Single Permanent Magnet Synchronous (175.24 kW electric motor) | Single Permanent Magnet Synchronous (175.24 kW electric motor) | Single Permanent Magnet Synchronous (175.24 kW electric motor) | Single Permanent Magnet Synchronous (175.24 kW electric motor) | Single Permanent Magnet Synchronous (175.24 kW electric motor) | Single Permanent Magnet Synchronous (175.24 kW electric motor) | Single Permanent Magnet Synchronous (175.24 kW electric motor) | Single Permanent Magnet Synchronous (175.24 kW electric motor) | Permanent Magnet Synchronous Motors | Permanent Magnet Synchronous Motors | Permanent Magnet Synchronous Motors |
| Electric Motor Max Power (bhp@rpm/KW) | 234bhp | 235 bhp (175 kW) | 235 bhp (175 kW) | 235 bhp (175 kW) | 235 bhp (175 kW) | 235 bhp (175 kW) | 235 bhp (175 kW) | 235 bhp (175 kW) | 235 bhp (175 kW) | 235 bhp (175 kW) | 235 bhp (175 kW) | 235 bhp (175 kW) | 235 bhp (175 kW) | 175 kW/234.67 hp | 175 kW/234.67 hp | 175 kW/234.67 hp |
| Max Torque (nm@rpm) | 315Nm | 315 Nm | 315 Nm | 315 Nm | 315 Nm | 315 Nm | 315 Nm | 315 Nm | 315 Nm | 315 Nm | 315 Nm | 315 Nm | 315 Nm | 315Nm | 315Nm | 315Nm |
| Drive Type | RDW | Rear‑Wheel Drive (RWD) | Rear‑Wheel Drive (RWD) | Rear‑Wheel Drive (RWD) | Rear‑Wheel Drive (RWD) | Rear‑Wheel Drive (RWD) | Rear‑Wheel Drive (RWD) | Rear‑Wheel Drive (RWD) | Rear‑Wheel Drive (RWD) | Rear‑Wheel Drive (RWD) | QWD | QWD Dual Motor Setup | QWD Dual Motor Setup | RWD | RWD | RWD |
| Steering Type & Column | Electric, Tilt & Telescopic | Electric power steering; tilt & telescopic column | Electric power steering; tilt & telescopic column | Electric power steering; tilt & telescopic column | Electric power steering; tilt & telescopic column | Electric power steering; tilt & telescopic column | Electric power steering; tilt & telescopic column | Electric power steering; tilt & telescopic column | Electric power steering; tilt & telescopic column | Electric power steering; tilt & telescopic column | Electric power steering; tilt & telescopic column | Electric power steering; tilt & telescopic column | Electric power steering; tilt & telescopic column | Electric, Tilt & Telescopic | Electric, Tilt & Telescopic | Electric, Tilt & Telescopic |
| Steering Adjustment | Height & reach (tilt/telescopic) | Height & reach (tilt/telescopic) | Height & reach (tilt/telescopic) | Height & reach (tilt/telescopic) | Height & reach (tilt/telescopic) | Height & reach (tilt/telescopic) | Height & reach (tilt/telescopic) | Height & reach (tilt/telescopic) | Height & reach (tilt/telescopic) | Height & reach (tilt/telescopic) | Height & reach (tilt/telescopic) | Height & reach (tilt/telescopic) | ||||
| Turning Radius (Metres) | 5.75 m | 5.75 m | 5.75 m | 5.75 m | 5.75 m | 5.75 m | 5.75 m | 5.75 m | 5.75 m | 5.75 m | 5.75 m | 5.75 m | 5.75 meters | 5.75 meters | 5.75 meters | |
| Drive Modes | Boost, Sport, City & Eco. | 3 modes (Eco | City | Sport) plus Terrain modes: Normal, Wet/Rain, Rough Road, Drift Mode | 3 modes (Eco | City | Sport) plus Terrain modes: Normal, Wet/Rain, Rough Road, Drift Mode | 3 modes (Eco | City | Sport) plus Terrain modes: Normal, Wet/Rain, Rough Road, Drift Mode | 3 modes (Eco | City | Sport) plus Terrain modes: Normal, Wet/Rain, Rough Road, Drift Mode | 3 modes (Eco | City | Sport) plus Terrain modes: Normal, Wet/Rain, Rough Road, Drift Mode | 3 modes (Eco | City | Sport) plus Terrain modes: Normal, Wet/Rain, Rough Road, Drift Mode | 3 modes (Eco | City | Sport) plus Terrain modes: Normal, Wet/Rain, Rough Road, Drift Mode | 3 modes (Eco | City | Sport) plus Terrain modes: Normal, Wet/Rain, Rough Road, Drift Mode | 3 modes (Eco | City | Sport) plus Terrain modes: Normal, Wet/Rain, Rough Road, Drift Mode | 3 modes (Eco | City | Sport) plus Terrain modes: Normal, Wet/Rain, Rough Road, Drift Mode | 3 modes (Eco | City | Sport) plus 6 Terrain modes (Normal, Snow/Grass, Mud-Ruts, Sand, Rock Crawl, Custom) | 3 modes (Eco | City | Sport) plus 6 Terrain modes (Normal, Snow/Grass, Mud-Ruts, Sand, Rock Crawl, Custom) | Boost, Sport, City & Eco. | Boost, Sport, City & Eco. | Boost, Sport, City & Eco. |
| Regenerative Braking Levels | 4 | 4 levels | 4 levels | 4 levels | 4 levels | 4 levels | 4 levels | 4 levels | 4 levels | 4 levels | 4 levels | 4 levels | 4 levels | 4 | 4 | 4 |
| Single Pedal Drive | Yes (pure electric driving mode) | Yes (pure electric driving mode) | Yes (pure electric driving mode) | Yes (pure electric driving mode) | Yes (pure electric driving mode) | Yes (pure electric driving mode) | Yes (pure electric driving mode) | Yes (pure electric driving mode) | Yes (pure electric driving mode) | Yes (pure electric driving mode) | Yes (pure electric driving mode) | Yes (pure electric driving mode) | ||||
| Virtual Engine Sound | ||||||||||||||||
| Front Suspension | MacPherson Strut suspension | MacPherson Strut suspension (independent) | MacPherson Strut suspension (independent) | MacPherson Strut suspension (independent) | MacPherson Strut suspension (independent) | MacPherson Strut suspension (independent) | MacPherson Strut suspension (independent) | MacPherson Strut suspension (independent) | MacPherson Strut suspension (independent) | MacPherson Strut suspension (independent) | MacPherson Strut suspension (independent) | MacPherson Strut suspension (independent) | MacPherson Strut suspension (independent) | MacPherson Strut suspension | MacPherson Strut suspension | MacPherson Strut suspension |
| Rear Suspension | Multi-link suspension | Multi‑link independent suspension with stabilizer bar | Multi‑link independent suspension with stabilizer bar | Multi‑link independent suspension with stabilizer bar | Multi‑link independent suspension with stabilizer bar | Multi‑link independent suspension with stabilizer bar | Multi‑link independent suspension with stabilizer bar | Multi‑link independent suspension with stabilizer bar | Multi‑link independent suspension with stabilizer bar | Multi‑link independent suspension with stabilizer bar | Multi‑link independent suspension with stabilizer bar | Multi‑link independent suspension with stabilizer bar | Multi‑link independent suspension with stabilizer bar | Multi-link suspension | Multi-link suspension | Multi-link suspension |
| Suspension Damper Type | ||||||||||||||||
| Shock Absorbers Type | Stabilizer Bar | FDD & MTVL shockers | FDD & MTVL shockers | FDD & MTVL shockers | ||||||||||||
| Technology | ||||||||||||||||
| Road Vibrations | ||||||||||||||||
| Tyre Type & Size | Radial Tubeless, 245/55 R19 | 245/55 R19, Radial tubeless tire | 245/55 R19, Radial tubeless tire | 245/55 R19, Radial tubeless tire | 245/55 R19, Radial tubeless tire | 245/55 R19, Radial tubeless tire | 245/55 R19, Radial tubeless tire | 245/55 R19, Radial tubeless tire | 245/55 R19, Radial tubeless tire | 245/55 R19, Radial tubeless tire | 245/55 R19, Radial tubeless tire | 245/55 R19, Radial tubeless tire | 245/55 R19, Radial tubeless tire | Radial Tubeless, 245/55 R19 | Radial Tubeless, 245/55 R19 | Radial Tubeless, 245/55 R19 |
| Cruise Control | ||||||||||||||||
| Boost Mode | ||||||||||||||||
| Performance Dashboard | Digital cluster (10.25″) with performance and driving data | Digital cluster (10.25″) with performance and driving data | Digital cluster (10.25″) with performance and driving data | Digital cluster (10.25″) with performance and driving data | Digital cluster (10.25″) with performance and driving data | Digital cluster (10.25″) with performance and driving data | Digital cluster (10.25″) with performance and driving data | Digital cluster (10.25″) with performance and driving data | m Cinematic Infotainment Screen by Harman Powered by Samsung Neo QLED | m Cinematic Infotainment Screen by Harman Powered by Samsung Neo QLED | m Cinematic Infotainment Screen by Harman Powered by Samsung Neo QLED | m Cinematic Infotainment Screen by Harman Powered by Samsung Neo QLED | ||||
| 1-100 Km Acceleration (Sec) | 6.3^ sec | 6.3 sec | 6.3 sec | 6.3 sec | 6.3 sec | 6.3 sec | 6.3 sec | 6.3 sec | 6.3 sec | 6.3 sec | 6.3 sec | 6.3 sec | 6.3 sec | 6.3^ sec | 6.3^ sec | 6.3^ sec |
| Top Speed | 180 km/h | 180 km/h | 180 km/h | 180 km/h | 180 km/h | 180 km/h | 180 km/h | 180 km/h | 180 km/h | 180 km/h | 180 km/h | 180 km/h | 180 kmph | 180 kmph | 180 kmph | |
| Real World Range | 350-400 km | 350-400 km | 350-400 km | 350-400 km | 350-400 km | 350-400 km | 480 to 505 km | 480 to 505 km | 480 to 505 km | 480 to 505 km | 480 to 505 km | 480 to 505 km | ||||
| ARAI Range | 627 km | 538 km | 538 km | 538 km | 538 km | 538 km | 538 km | 627 km | 627 km | 627 km | 627 km | 627 km | 627 km | 627 km | 627 km | 627 km |
| Number of Electric Motor | 1 | 1 | 1 | 1 | 1 | 1 | 1 | 1 | 1 | 1 | 2 | 2 | 2 | 1 | 1 | 1 |
Car Latest Updates
Here are the latest updates on the Tata Harrier EV:
- Launch Date: Officially launched in India on June 3, 2025.
- Platform: Based on Tata’s modular ACTi.ev+ electric vehicle architecture.
- Variants: Available in Adventure, Fearless, Empowered, and Stealth Edition.
- Starting Price: ₹21.49 lakh (ex-showroom); top-end AWD priced at ₹28.99 lakh.
- Battery & Performance:
- 65 kWh RWD with 235 bhp
- 75 kWh AWD with 390 bhp and Boost Mode
- Charging Speed:
- 120 kW DC fast charging
- 250 km range in 15 mins (fast charger)
- 20-80% charge in 25 minutes
- Design & Colors:
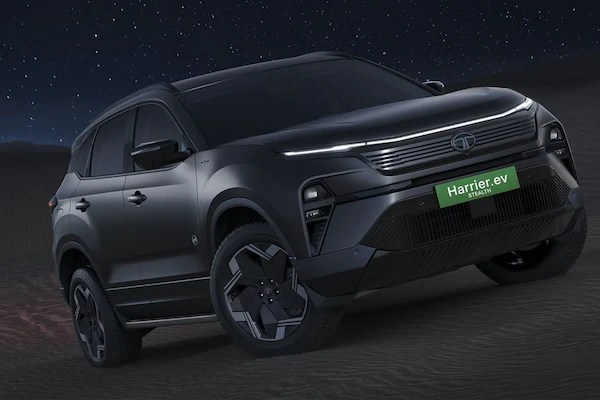
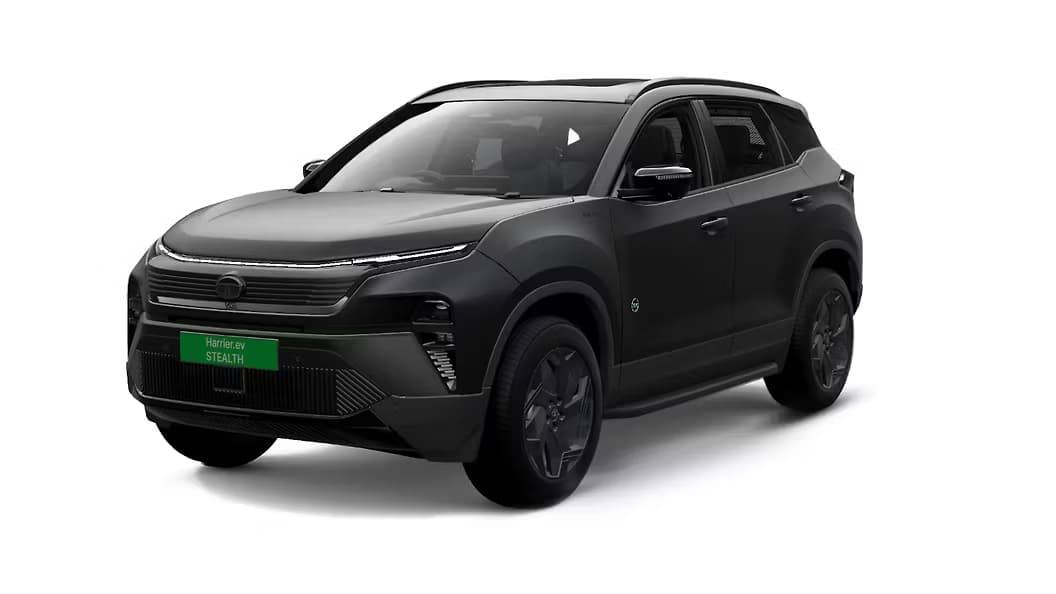
- Aerodynamic grille, EV-specific alloy wheels
- 5 colors: Nainital Nocturne, Empowered Oxide, Pristine White, Pure Grey, and Stealth Edition
FAQs – Tata Harrier EV
1. What is the driving range of the Tata Harrier EV on a full charge?
The Harrier EV offers a claimed range of 538–627 km, depending on the battery pack and drivetrain. Real-world range is approximately 480–505 km.
2. Is the Harrier EV available in both RWD and AWD?
Yes, it is available in Rear-Wheel Drive (RWD) and All-Wheel Drive (AWD). The AWD variant comes with a dual-motor QWD setup and Boost Mode.
3. How fast can the Harrier EV accelerate?
The AWD variant accelerates from 0–100 km/h in just 6.3 seconds using Boost Mode.
4. Does the Harrier EV support fast charging?
Yes, it supports up to 120 kW DC fast charging. A 15-minute charge can give up to 250 km of range, while a 20–80% charge takes around 25 minutes.
5. What is the price range of the Tata Harrier EV in India?
The introductory ex-showroom prices start at ₹21.49 lakh and go up to ₹28.99 lakh for the top AWD variant.
6. How safe is the Harrier EV?
It has received a 5-star Bharat NCAP rating and includes advanced safety features such as Level 2 ADAS, 6–7 airbags, and a 540-degree camera system.
7. What are the key tech features of the Harrier EV?
The SUV features a 14.5” Neo QLED infotainment system, Dolby Atmos 10-speaker JBL audio, dual-zone AC, Auto Park Assist, Summon mode, V2L and V2V charging, and multi-color ambient lighting.
8. What color options are available?
You can choose from Nainital Nocturne, Empowered Oxide, Pristine White, Pure Grey, and Stealth Edition (black theme).
Final Thoughts
The Tata Harrier EV is a bold step toward sustainable mobility, blending cutting-edge electric drivetrain technology with the luxury and performance that Indian consumers now expect in the premium SUV category. Whether it’s the futuristic design, robust range, or high-end cabin experience, the Harrier EV is engineered to deliver a well-rounded electric driving experience for urban explorers and off-road enthusiasts alike.
Related Articles:-